ESP8266 でIoT その3 MQTT(1)
■Wi-Fiの接続をする
ESP8266はIEEE 802.11bとgが使えるWi-FiモジュールをICの中にもっています。2.4GHz帯を使います。Wi-Fiのサンプル・スケッチを使ってアクセス・ポイントにつなげます。
メニューのスケッチ例からESP8266WiFi->WiFiClientを選びます。
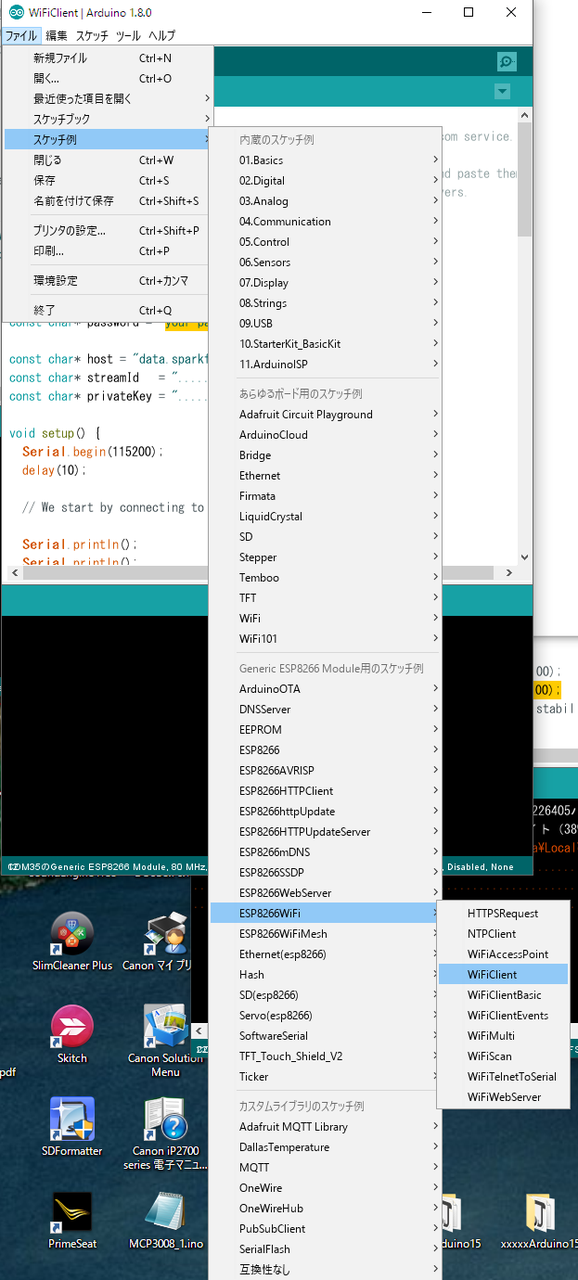
変更するのは、ssidとpasswordの定数です。

your-ssidをアクセス・ポイントの名前、your-passwordにはパスワードを入れ、温度測定のときと同じく、ボードにGeneric ESP8266 Moduleを選び、3か所を変更します。
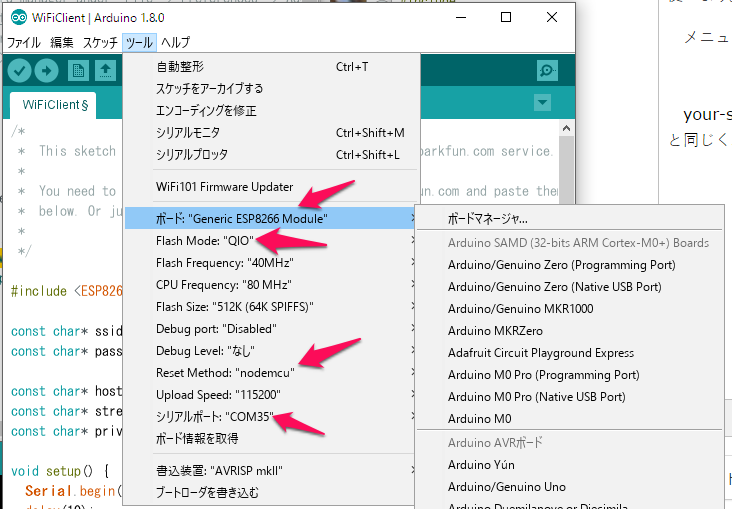
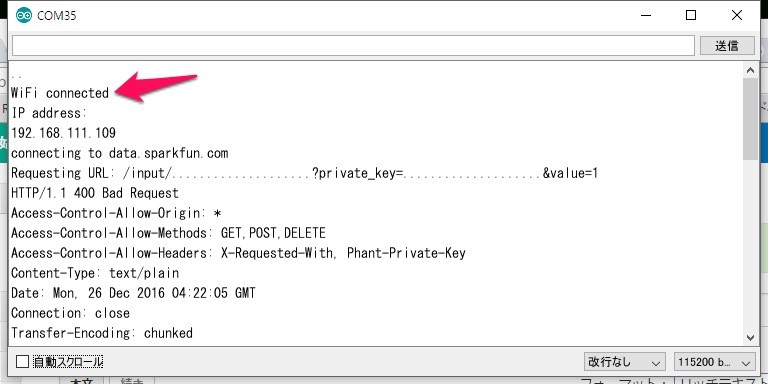
マイコンボードに書き込むボタンを押し、書き込みが終了したらシリアルモニタを開きます。接続できたら完了です。
●MQTTブローカに温度データをパブリッシュする
メニューのスケッチからライブラリマネージャを起動し、pubsubで検索し、PubSubClientをインストールします。
PubSubClientに入っているスケッチ例Basic ESP8266 MQTT exampleを参考に修正します。topicは「ondo」にしています。MQTTブローカのIPアドレスは192.168.111.50です。ラズパイのnode-REDが動いています。
/*
 Basic ESP8266 MQTT example
This sketch demonstrates the capabilities of the pubsub library in combination
 with the ESP8266 board/library.

It connects to an MQTT server then:
 - publishes "hello world" to the topic "outTopic" every two seconds
 - subscribes to the topic "inTopic", printing out any messages
 it receives. NB - it assumes the received payloads are strings not binary
 - If the first character of the topic "inTopic" is an 1, switch ON the ESP Led,
 else switch it off

It will reconnect to the server if the connection is lost using a blocking
 reconnect function. See the 'mqtt_reconnect_nonblocking' example for how to
 achieve the same result without blocking the main loop.

 To install the ESP8266 board, (using Arduino 1.6.4+):
 - Add the following 3rd party board manager under "File -> Preferences -> Additional Boards Manager URLs":
 http://arduino.esp8266.com/stable/package_esp8266com_index.json
 - Open the "Tools -> Board -> Board Manager" and click install for the ESP8266"
 - Select your ESP8266 in "Tools -> Board"
PubSubClient ライブラリ
Copyright (c) 2008-2015 Nicholas O'Leary
*/

#include <ESP8266WiFi.h>
#include <PubSubClient.h>

 // Update these with values suitable for your network.

const char* ssid = "Buffalo-G-F208";
const char* password = "XXXXXXX";
const char* mqtt_server = "192.168.111.50";

WiFiClient espClient;
PubSubClient client(espClient);
long lastMsg = 0;
char msg[50];
int value = 0;

void setup() {
  pinMode(BUILTIN_LED, OUTPUT); // Initialize the BUILTIN_LED pin as an output
  Serial.begin(115200);
  setup_wifi();
  client.setServer(mqtt_server, 1883);
  client.setCallback(callback);
}

void setup_wifi() {

  delay(10);
  // We start by connecting to a WiFi network
  Serial.println();
  Serial.print("Connecting to ");
  Serial.println(ssid);

  WiFi.begin(ssid, password);

   while (WiFi.status() != WL_CONNECTED) {
     delay(500);
     Serial.print(".");
  }

  Serial.println("");
  Serial.println("WiFi connected");
  Serial.println("IP address: ");
  Serial.println(WiFi.localIP());
}

void callback(char* topic, byte* payload, unsigned int length) {
  Serial.print("Message arrived [");
  Serial.print(topic);
  Serial.print("] ");
  for (int i = 0; i < length; i++) {
      Serial.print((char)payload[i]);
  }
  Serial.println();

  // Switch on the LED if an 1 was received as first character
  if ((char)payload[0] == '1') {
      digitalWrite(BUILTIN_LED, LOW); // Turn the LED on (Note that LOW is the voltage level
     // but actually the LED is on; this is because
     // it is acive low on the ESP-01)
  } else {
      digitalWrite(BUILTIN_LED, HIGH); // Turn the LED off by making the voltage HIGH
  }

}

void reconnect() {
  // Loop until we're reconnected
  while (!client.connected()) {
      Serial.print("Attempting MQTT connection... ");
      // Attempt to connect
      if (client.connect("ESP8266Client")) {
        Serial.println("connected");
        // Once connected, publish an announcement...
        client.publish("ondo", "from Arduino ----reconnect");
        // ... and resubscribe
        //client.subscribe("vol001");
      } else {
        Serial.print("failed, rc=");
        Serial.print(client.state());
        Serial.println(" try again in 5 seconds");
        // Wait 5 seconds before retrying
        delay(5000);
      }
  }
}
void loop() {

  if (!client.connected()) {
      reconnect();
  }
  client.loop();
  delay(2000);
  long now = millis();
  if (now - lastMsg > 200) {
      lastMsg = now;
      ++value;
      snprintf (msg, 75, "ESP8226- #%ld", value);
      Serial.print("Publish message: ");
      Serial.println(msg);
      client.publish("ondo", msg);
  }
      Serial.print(" Received " + client.subscribe("ondo"));
}
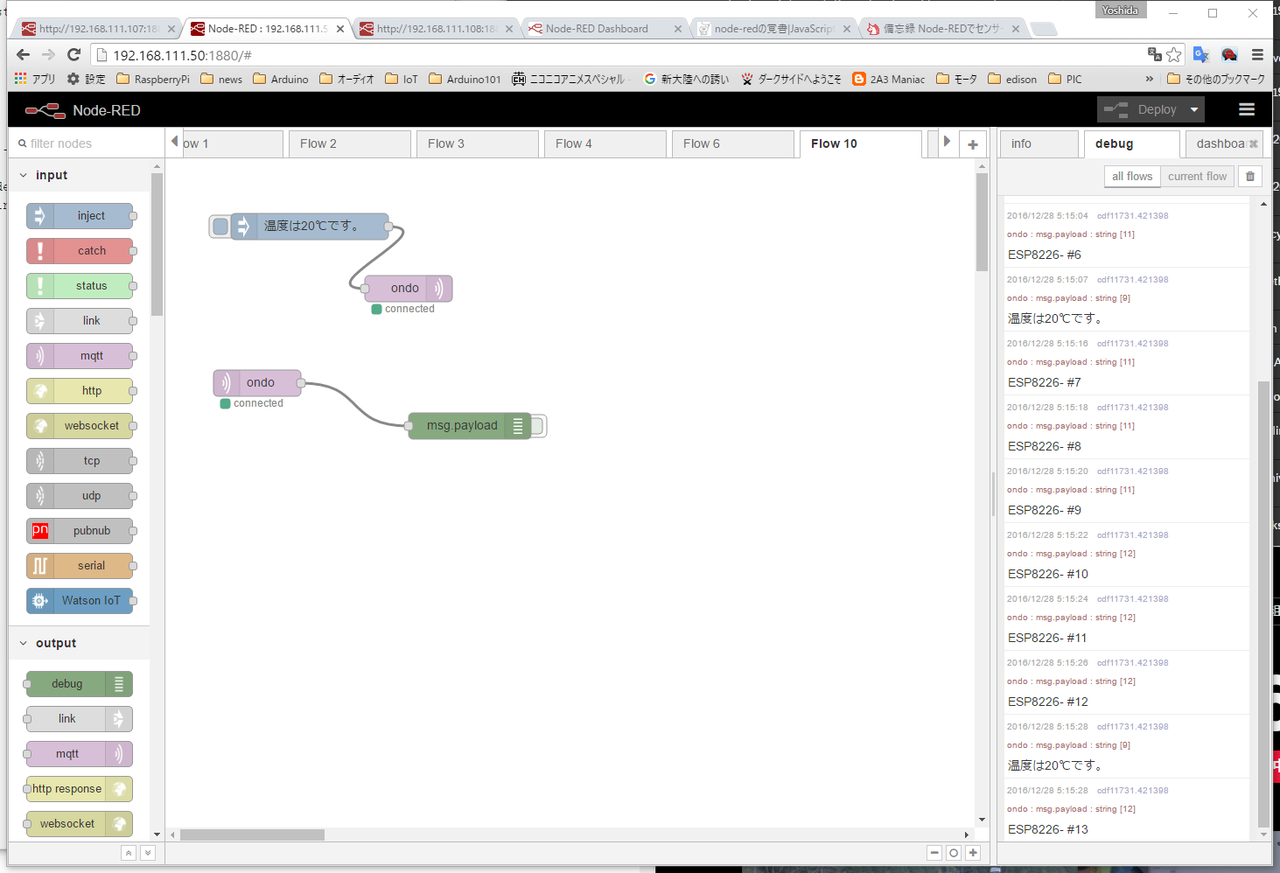
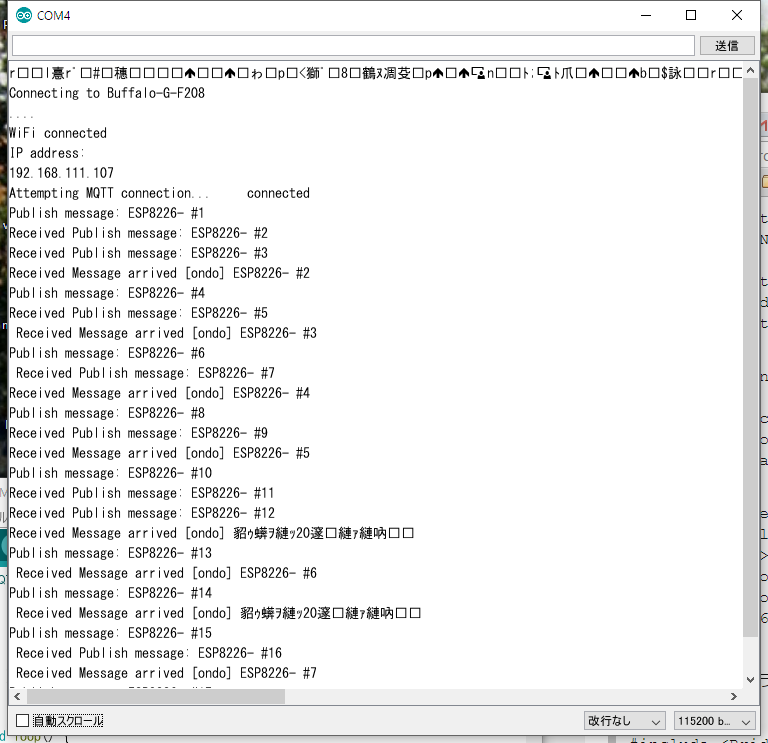
ESP8266のシリアルモニタです。サブクライブして文字化けしているのは、ラズパイからの「温度は20℃です。」もメッセージです。
ラズパイ側のdebugエリヤにはメッセージが表示されています。MQTTブローカでもあるラズパイの設定は、 Arduino YUN Mini でIoT その3 MQTT(1) を参照してください。ラズパイのIPアドレスは192.168.111.50です。