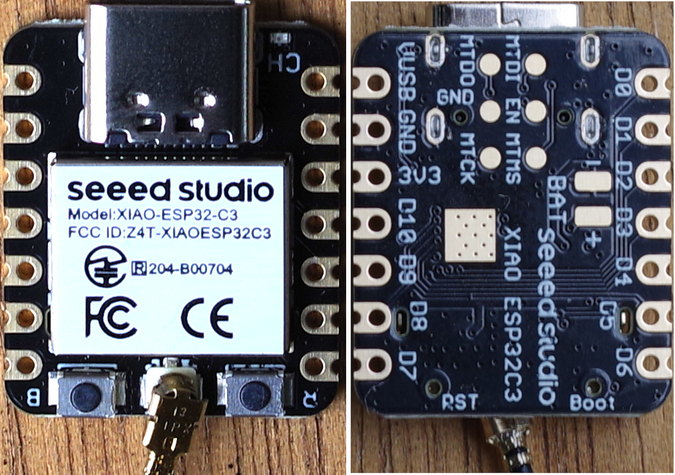
Seeed Studio XIAO ESP32C3でBLE ③ I2CでセンサBMP280をつなぐ
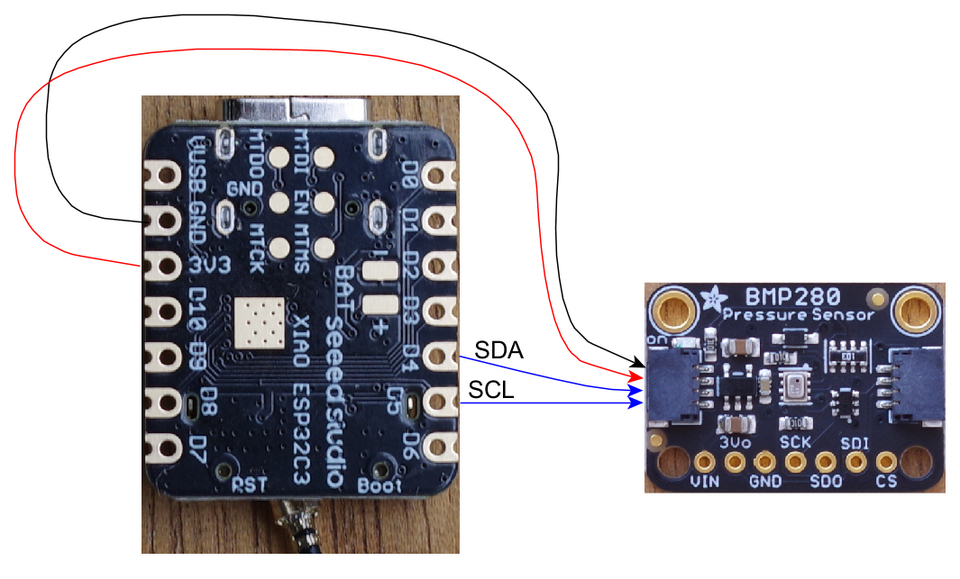
マイコン・ボードXIAO ESP32C3のI2Cインターフェースにセンサをつなぎます。I/O電圧は3.3Vと思われます。
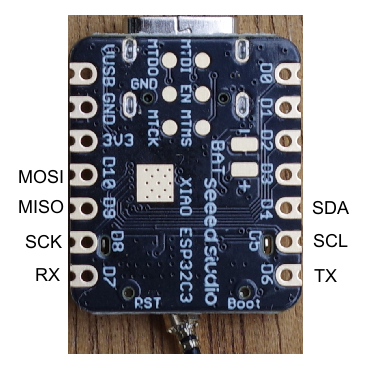
●I2C、SPI、UARTのピン配置
●気圧センサBMP280
気圧と温度が得られるBMP280をI2Cインターフェースでつなぎます。Adafruitの4ピン・コネクタ(STEMMA QT)をはんだ付けしました。
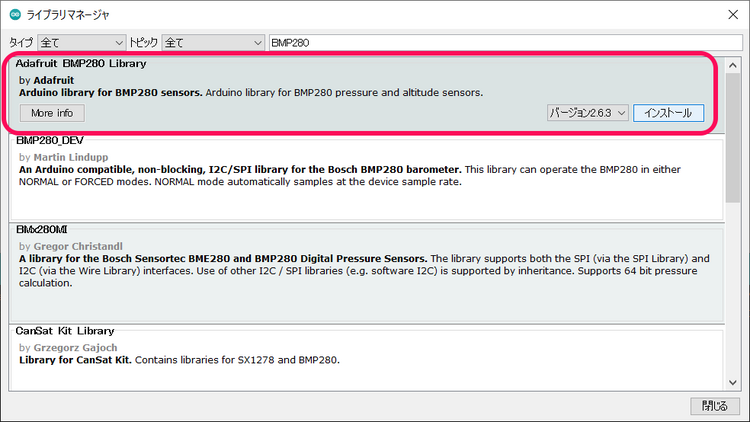
ライブラリを管理から、BMP280のライブラリをインストールします。Adafruitのセンサを初めて使うときは、もろもろのライブラリのインストールをするかと聞かれるので、yesと答えます。
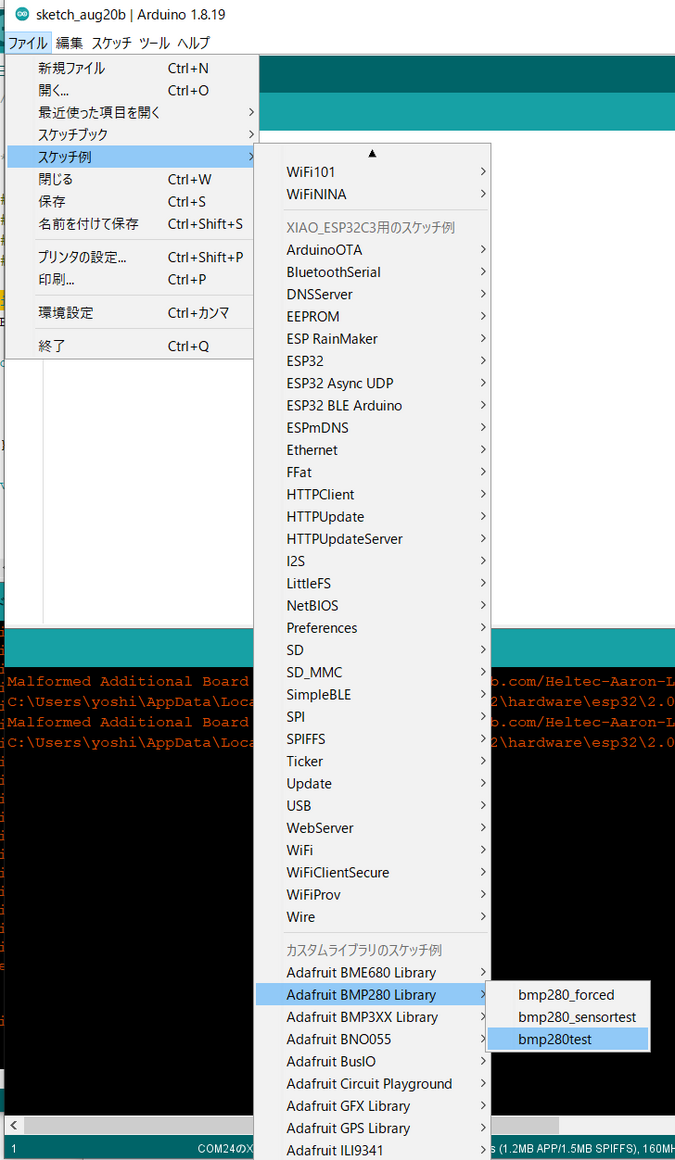
サンプルのスケッチ例からをbmp280testをインストールします。
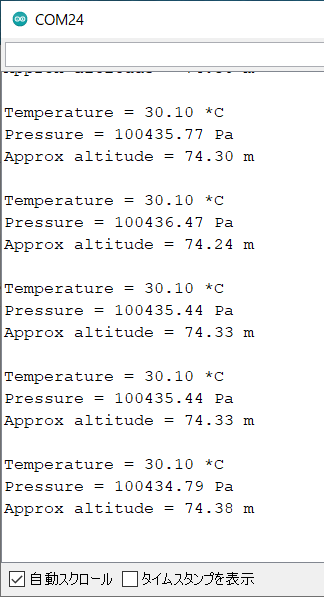
コンパイルして実行します。
bmp280testから必要な部分を残します。
//  Written by Limor Fried & Kevin Townsend for Adafruit Industries.

#include <Wire.h>
#include <Adafruit_BMP280.h>

Adafruit_BMP280 bmp; // I2C

void setup() {
  Serial.begin(9600);
  while ( !Serial ) delay(100);   // wait for native usb
  bmp.begin();
  /* Default settings from datasheet. */
  bmp.setSampling(Adafruit_BMP280::MODE_NORMAL,     /* Operating Mode. */
                  Adafruit_BMP280::SAMPLING_X2,     /* Temp. oversampling */
                  Adafruit_BMP280::SAMPLING_X16,    /* Pressure oversampling */
                  Adafruit_BMP280::FILTER_X16,      /* Filtering. */
                  Adafruit_BMP280::STANDBY_MS_500); /* Standby time. */
}

void loop() {
    Serial.print("Temperature = ");
    Serial.print(bmp.readTemperature());
    Serial.println(" *C");

    Serial.print("Pressure = ");
    Serial.print(bmp.readPressure()/100);
    Serial.println(" hPa");

    Serial.println();
    delay(2000);
}
●BLEペリフェラル
BMP280の測定値をBLEで送信します。
/*
    Based on Neil Kolban example for IDF: https://github.com/nkolban/esp32-snippets/blob/master/cpp_utils/tests/BLE%20Tests/SampleServer.cpp
    Ported to Arduino ESP32 by Evandro Copercini
    updates by chegewara
// Written by Limor Fried & Kevin Townsend for Adafruit Industries.
*/

#include <BLEDevice.h>
#include <BLEUtils.h>
#include <BLEServer.h>
#include <Wire.h>
#include <Adafruit_Sensor.h>
#include <Adafruit_BMP280.h>

float temp = 0;
float press = 0;

#define SERVICE_UUID          "4fafc201-1fb5-459e-8fcc-c5c9c331914b"
#define CHARACTERISTIC_T_UUID "beb5483d-36e1-4688-b7f5-ea07361b26a8"
#define CHARACTERISTIC_P_UUID "beb5483e-36e1-4688-b7f5-ea07361b26a8"

BLECharacteristic *tCharacteristic;
BLECharacteristic *pCharacteristic;

Adafruit_BMP280 bmp; // I2C

void setup() {
  Serial.begin(115200);
  while(!Serial);
  Serial.println("Starting BMP280 work!");
  bmp.begin();
  bmp.setSampling(Adafruit_BMP280::MODE_NORMAL,     /* Operating Mode. */
                  Adafruit_BMP280::SAMPLING_X2,     /* Temp. oversampling */
                  Adafruit_BMP280::SAMPLING_X16,    /* Pressure oversampling */
                  Adafruit_BMP280::FILTER_X16,      /* Filtering. */
                  Adafruit_BMP280::STANDBY_MS_500); /* Standby time. */

  BLEDevice::init("ESP32-BMP280 peripheral");
  BLEServer *pServer = BLEDevice::createServer();
  BLEService *pService = pServer->createService(SERVICE_UUID);
  tCharacteristic = pService->createCharacteristic(
                                         CHARACTERISTIC_T_UUID,
                                         BLECharacteristic::PROPERTY_READ |
                                         BLECharacteristic::PROPERTY_NOTIFY
                                       );
  pCharacteristic = pService->createCharacteristic(
                                         CHARACTERISTIC_P_UUID,
                                         BLECharacteristic::PROPERTY_READ |
                                         BLECharacteristic::PROPERTY_NOTIFY
                                       );
  pService->start();
  BLEAdvertising *pAdvertising = BLEDevice::getAdvertising();
  pAdvertising->addServiceUUID(SERVICE_UUID);
  pAdvertising->setScanResponse(true);
  BLEDevice::startAdvertising();
}

void loop() {
  readBMP280();
  tCharacteristic->setValue(temp);
  tCharacteristic->notify();
  pCharacteristic->setValue(press);
  pCharacteristic->notify();

  delay(2000);
}

void readBMP280() {
    Serial.print("Temperature = ");
    temp = bmp.readTemperature();
    Serial.print(temp);
    Serial.println(" *C");

    Serial.print("Pressure = ");
    press = bmp.readPressure() / 100.0;
    Serial.print(press);
    Serial.println(" hPa");

    Serial.println();
}
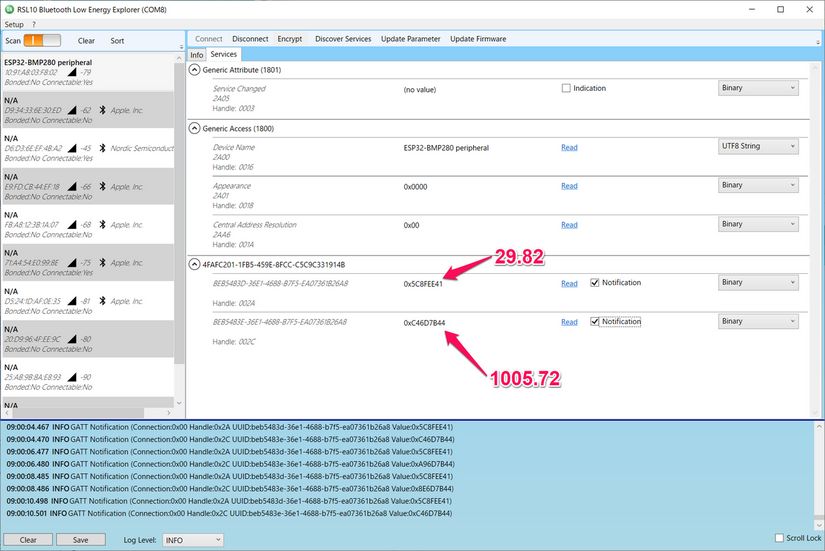
オンセミのBLEであるRSL10 Bluetooth Low Enaergy Exploerを使って情報を見ます。
connectして、Nothificationをチェックすると、実数形式でデータを送ってきます。このサイトで、データの変換をしました。
