Groveで広がるArduinoの世界-Senser Kit-⑨ Grove Sound Sensor
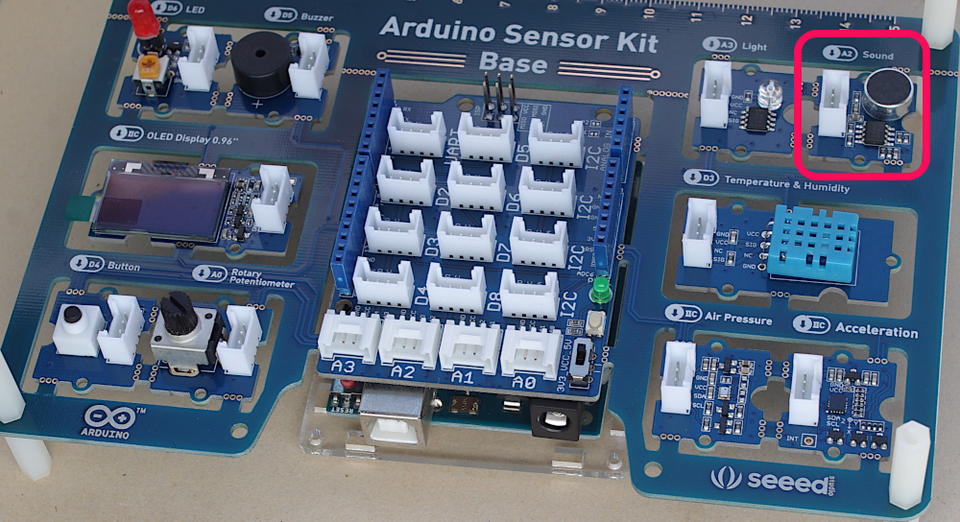
Grove Sound Sensorはコンデンサ・マイクで、製造元によれば、次のように注意書きがあります。
このサウンドセンサーは、サウンドサラウンドの有無を検出するために使用されます。モジュールを使用してサウンド信号を収集しないでください。たとえば、サウンドコントロールランプの作成には使用できますが、録音デバイスとしては使用できません。
周波数帯域は16〜20kHzあるので、音声や楽器の音を検出するのに使えそうです。同社の類似するボードに、
などがあります。
●接続
コンデンサ・マイクの出力には、OPアンプLM358がつながっていて、マイクでとらえた信号を増幅します。出力にはコンデンサ220nF(0.22uF)経由してSIG端子につながっています。
信号SIG端子は、アナログ入力のA2につないで使います。
| Groveピン番号 | 内部接続 |
|---|---|
| 4 GND | GND |
| 3 Vcc | Vcc |
| 2 NC | NC |
| 1 SIG | アンプ出力(交流) |
●プログラム
THE SOUND SENSORのページにあるサンプル・スケッチを動かします。
soundValue += analogRead(sound_sensor);
は、
soundValue = soundValue + analogRead(sound_sensor);
と同じです。この記述の前にfor文で32回繰り返すようにしているので、読み取ったデータを32回加算しています。
soundValue >>= 5;
は、
soundValue = soundValue >> 5;
と同じです。soundValueを右に5回シフトするということは、soundValue / 2^5と同じですから、soundValue / 32です。
上記の計算は、32回の読み取ったデータを平均していると解釈できます。
int sound_sensor = A2; //assign to pin A0

void setup()
{
  Serial.begin(9600); //begin Serial Communication
}

void loop()
{
  int soundValue = 0; //create variable to store many different readings
  for (int i = 0; i < 32; i++) //create a for loop to read
  { soundValue += analogRead(sound_sensor);  } //read the sound sensor

  soundValue >>= 5; //bitshift operation
  Serial.println(soundValue); //print the value of sound sensor


//if a value higher than 500 is registered, we will print the following
//this is done so that we can clearly see if the threshold is met
  if (soundValue > 500) {
    Serial.println("         ||        ");
    Serial.println("       ||||||      ");
    Serial.println("     |||||||||     ");
    Serial.println("   |||||||||||||   ");
    Serial.println(" ||||||||||||||||| ");
    Serial.println("   |||||||||||||   ");
    Serial.println("     |||||||||     ");
    Serial.println("       ||||||      ");
    Serial.println("         ||        ");
  }
  delay(50); //a shorter delay between readings
}
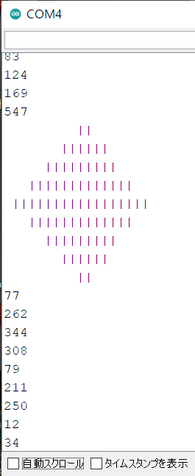
実行中の様子です。
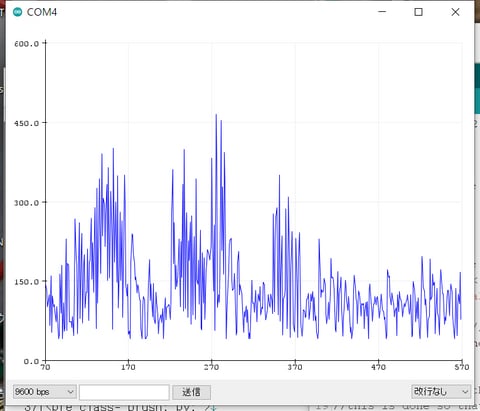
シリアルモニタを終了し、シリアルプロッタの出力を表示しました。


