7セグLED表示 その6 8文字-MAX7219
コントローラMAX7219は7セグメントLEDをマイコンと容易につなぐことができます。アマゾンで8桁の製品を入手しました。

● MAX7219のおもな特徴
- LED表示 8桁
- BCDデコード・モード
- 文字 0~9、-、E、H、L、P、blank、DP
- 輝度 16段階
- シリアル接続 SPI
- 動作電圧 4~5V
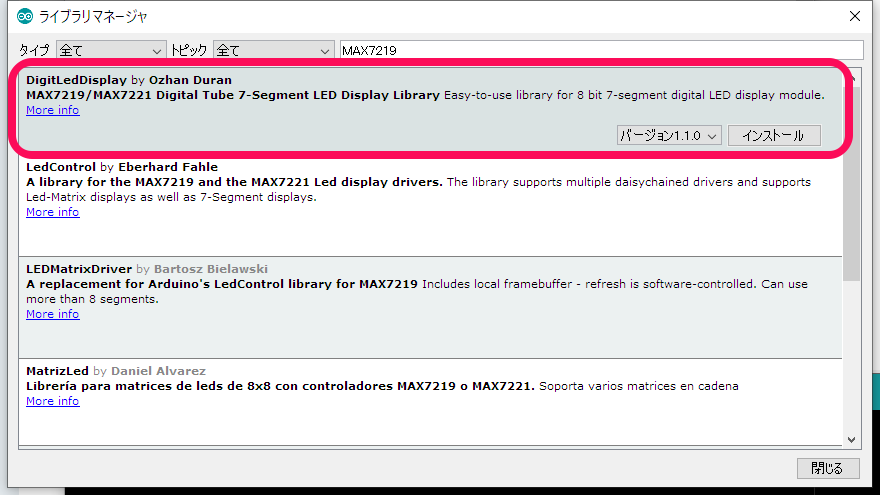
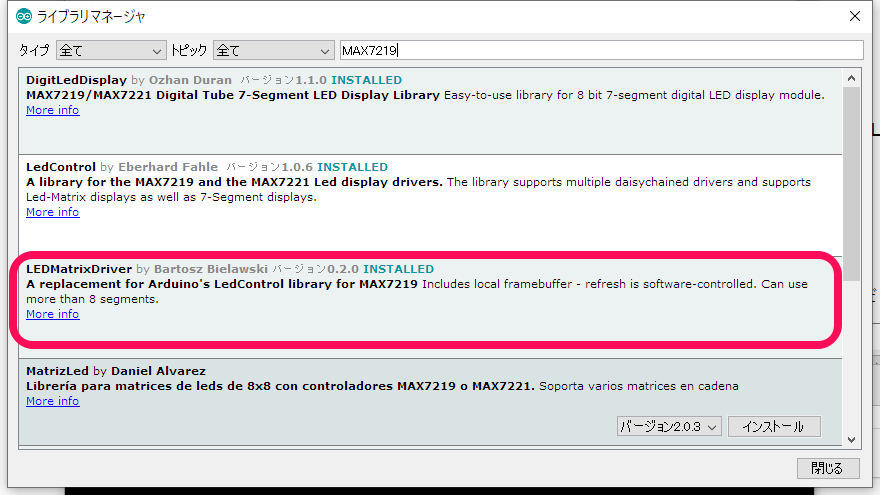
●ライブラリの導入
ライブラリの検索で複数見つけました。最初にあったDigitLedDisplayをインストールします。
サンプルのDigit7SegmentDemoスケッチを動かします。スケッチ内部に接続が書かれています。
| MAX7219 | Arduino UNO |
|---|---|
| CLK | 5 |
| CS | 6 |
| Din | 7 |
| GND | GND |
| Vcc | 5V |
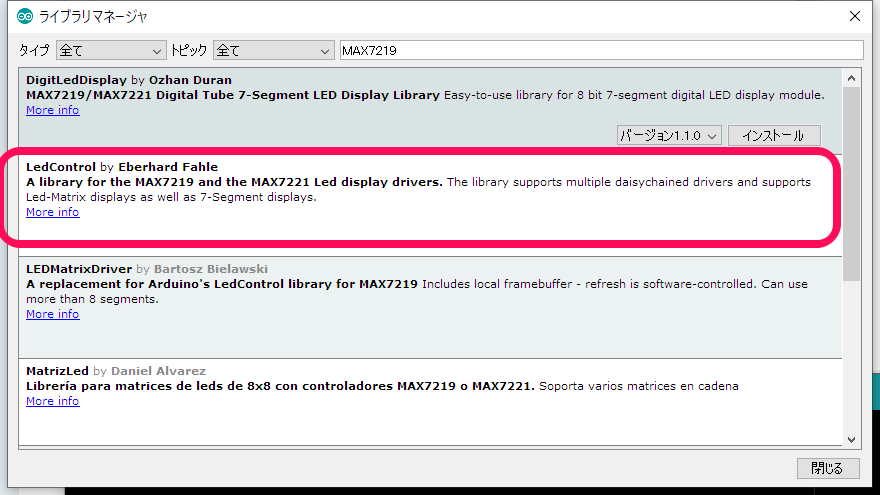
しかし、小数点のドットと数字を同時に表示する方法が見つからなかったので、別のライブラリを探します。
2番目に出てきたLedControlをインストールします。
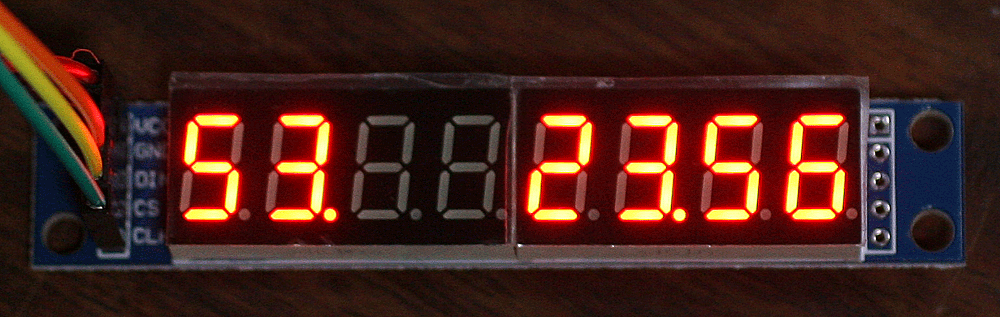
スケッチ例からLCDemo7Segmentを読み込みます。修正して、「53.」と「23.56」を表示しました。1文字ずつ表示し、ドットをつけるかどうかも併せて指示します。LOADはCSピンです。
//We always have to include the library
#include "LedControl.h"
/*
 Now we need a LedControl to work with.
 ***** These pin numbers will probably not work with your hardware *****
 pin 12 is connected to the DataIn
 pin 11 is connected to the CLK
 pin 10 is connected to LOAD
 We have only a single MAX72XX.
 */
LedControl lc=LedControl(12,11,10,1);
/* we always wait a bit between updates of the display */
unsigned long delaytime=250;

void setup() {
 /*
 The MAX72XX is in power-saving mode on startup,
 we have to do a wakeup call
 */
 lc.shutdown(0,false);
 /* Set the brightness to a medium values */
 lc.setIntensity(0,8);
 /* and clear the display */
 lc.clearDisplay(0);
}

void loop() {
    lc.clearDisplay(0);
    lc.setDigit(0,0,6,false);
    lc.setDigit(0,1,5,false);
    lc.setDigit(0,2,3,true);
    lc.setDigit(0,3,2,false);
    delay(2000);
    lc.setChar(0,7,'5',false);
    lc.setChar(0,6,'3',true);
    delay(2000);
}
3番目のライブラリも7segmentLEDに対応しているようです。
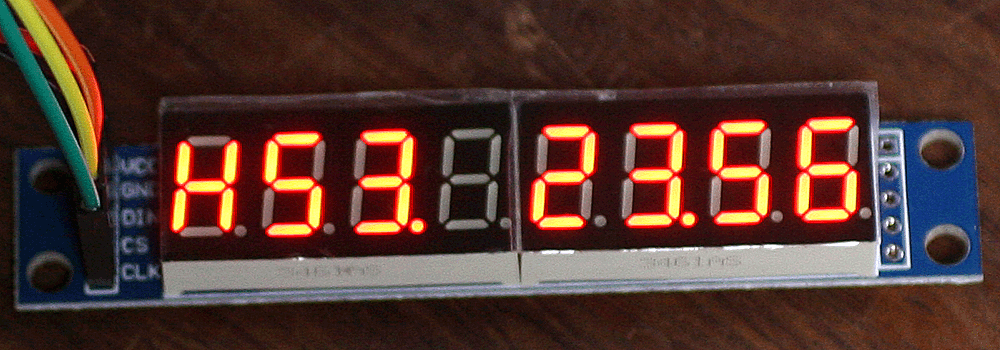
サンプルを修正して、「H53.」 「23.56」の表示ができました。
#include <LEDMatrixDriver.hpp>
// This sketch how to use 7-segment displays with the LEDMatrixDriver library.
// Example written 2017-09-30 by Søren Thing, https://github.com/Sthing.
// Define the ChipSelect pin for the led matrix (Dont use the SS or MISO pin of your Arduino!)
// Other pins are arduino specific SPI pins (MOSI=DIN of the LEDMatrix and CLK) see https://www.arduino.cc/en/Reference/SPI
const uint8_t LEDMATRIX_CS_PIN = 9;
const int NO_OF_DRIVERS = 1; // Each MAX7219 driver can drive eight 7-segment displays.
// The LEDMatrixDriver class instance
LEDMatrixDriver lmd(NO_OF_DRIVERS, LEDMATRIX_CS_PIN);

void setup() {
 // init the display
    lmd.setEnabled(true);
    lmd.setIntensity(2); // 0 = min, 15 = max
    lmd.setScanLimit(7); // 0-7: Show 1-8 digits. Beware of currenct restrictions for 1-3 digits! See datasheet.
    lmd.setDecode(0xFF); // Enable "BCD Type B" decoding for all digits.
}

void loop() {
    lmd.setDigit(3, 2, 0);
    lmd.setDigit(2, 3, 1);
    lmd.setDigit(1, 5, 0);
    lmd.setDigit(0, 6, 0);
    lmd.setDigit(7, LEDMatrixDriver::BCD_H);
    lmd.setDigit(6, 5, false);
    lmd.setDigit(5, 3, true);
    lmd.setDigit(4, LEDMatrixDriver::BCD_BLANK);
    lmd.display();
    delay(1000);
}
●LedControlを利用
接続です。
| MAX7219 | Arduino UNO |
|---|---|
| Vcc | 5V |
| GND | GND |
| Din | 12 |
| CS(LOAD) | 10 |
| CLK | 11 |
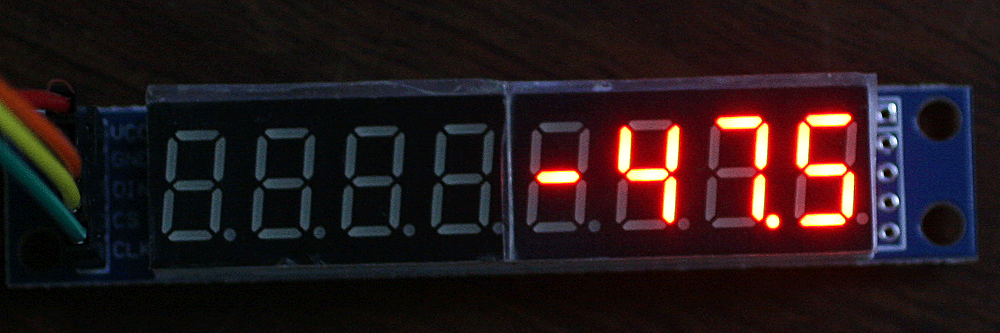
数値-47.5℃を表示します。
#include "LedControl.h"

LedControl lc=LedControl(12,11,10,1); // 12 DataIn, 11 CLK, 10 CS(LOAD)

void setup() {
    Serial.begin(9600);
    lc.shutdown(0,false);
    lc.setIntensity(0,6);
    lc.clearDisplay(0);
}

void loop() {
    float Temp = -47.5;
    if ( Temp<0 ) {
        lc.setChar(0,3,'-',false);; Temp= -1*Temp;
    } else {
        lc.setChar(0,0,' ',false);
    }
    if ( (String(Temp).length()) == 5) {
        lc.setChar(0,2, (String(Temp).charAt(0) ),false );
        lc.setChar(0,1, (String(Temp).charAt(1) ),true );
        lc.setChar(0,0, (String(Temp).charAt(3) ),false );
    } else if ( (String(Temp).length() ) == 4) {
        lc.setChar(0,1, (String(Temp).charAt(0) ),true );
        lc.setChar(0,0, (String(Temp).charAt(2) ),false );
    }
    delay(2000);
}
実行結果です。
●SHT31で温度と湿度を測って表示
SHT31のライブラリを入れます。検索で見つかった中のGrove SHT31 Temp Humi Sensorをインストールしました。
サンプル例に出てこなかったので、GitHubに行ってコピペして下記のexample.inoを動かしました。
#include <Arduino.h>
#include <Wire.h>
#include "SHT31.h"
SHT31 sht31 = SHT31();
void setup() {
    Serial.begin(9600);
    while(!Serial);
        Serial.println("begin...");
        sht31.begin();
}

void loop() {
    float temp = sht31.getTemperature();
    float hum = sht31.getHumidity();
    Serial.print("Temp = ");
    Serial.print(temp);
    Serial.println(" C"); //The unit for Celsius because original arduino don't support speical symbols
    Serial.print("Hum = ");
    Serial.print(hum);
    Serial.println("%");
    Serial.println();
    delay(1000);
}
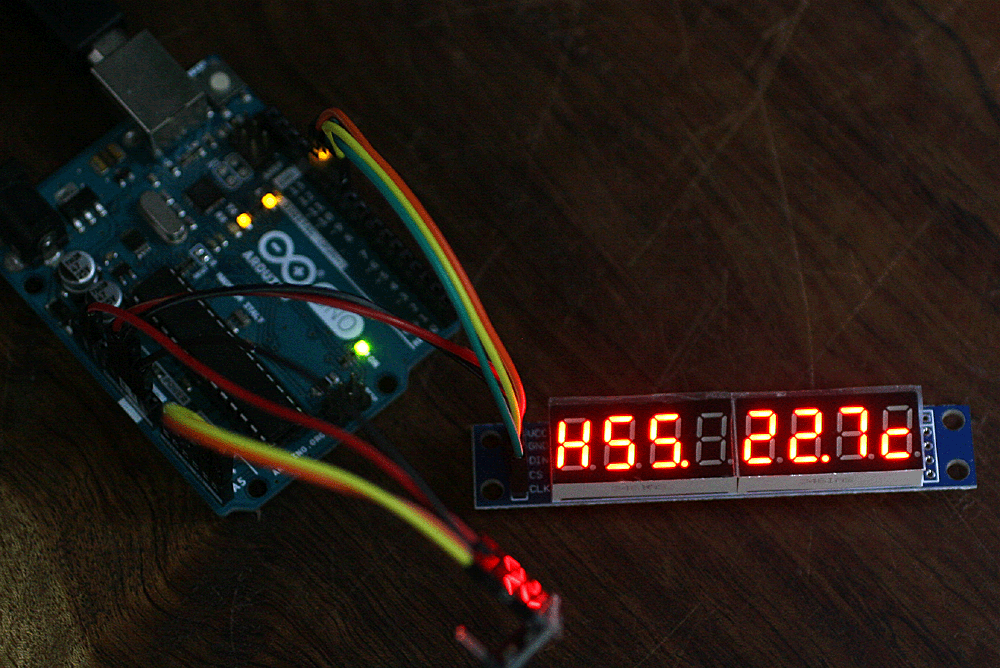
問題なく温度と湿度を表示できたので、8桁の7セグメントLEDに、湿度、温度を表示しました。読み出した湿度と温度を文字列に直します。ドットの前後で文字列を分離し、ドットを除いて合成します。7セグメントLEDではドットは文字列とは別に表示するからです。
温度は整数に直します。3桁の数値として表示し、ドットは4番目の引数です。最後の桁はMAX7219に登録されている文字'c'を表示しました。
湿度は上位2桁を残し、'H'の文字列と合成し、一番左の桁から表示します。
#include <Arduino.h>
#include <Wire.h>
#include "SHT31.h"
#include "LedControl.h"

SHT31 sht31 = SHT31();
LedControl lc=LedControl(12,11,10,1); // 12 DataIn, 11 CLK, 10 CS(LOAD)

void setup() {
    sht31.begin();
    Serial.begin(9600);
    lc.shutdown(0,false);
    lc.setIntensity(0,6);
    lc.clearDisplay(0);
}

void loop() {
    float Temp = sht31.getTemperature();
    float Hum = sht31.getHumidity();
    Serial.print("Temp = "); Serial.println(Temp);
    Serial.print("Hum = "); Serial.println(Hum);

    if ( Temp<0 ) {
        lc.setChar(0,3,'-',false);; Temp= -1*Temp;
    } else {
        lc.setChar(0,0,' ',false);
    }
    if ( (String(Temp).length()) == 5) {
        lc.setChar(0,3, (String(Temp).charAt(0) ),false );
        lc.setChar(0,2, (String(Temp).charAt(1) ),true );
        lc.setChar(0,1, (String(Temp).charAt(3) ),false );
    } else if ( (String(Temp).length() ) == 4) {
        lc.setChar(0,2, (String(Temp).charAt(0) ),true );
        lc.setChar(0,1, (String(Temp).charAt(2) ),false );
    }
    lc.setChar(0,0,'C',false);
    lc.setChar(0,7,'H',false);
    lc.setChar(0,6,(String(Hum).charAt(0) ),false);
    lc.setChar(0,5,(String(Hum).charAt(1) ),true);
    delay(1000);
}
実行している様子です。