CO2センサを使う⑪7セグメントLEDに表示
CO2センサを使う⑧AdafruitのSCD-30ボードをESP32につないでBLEペリフェラルに
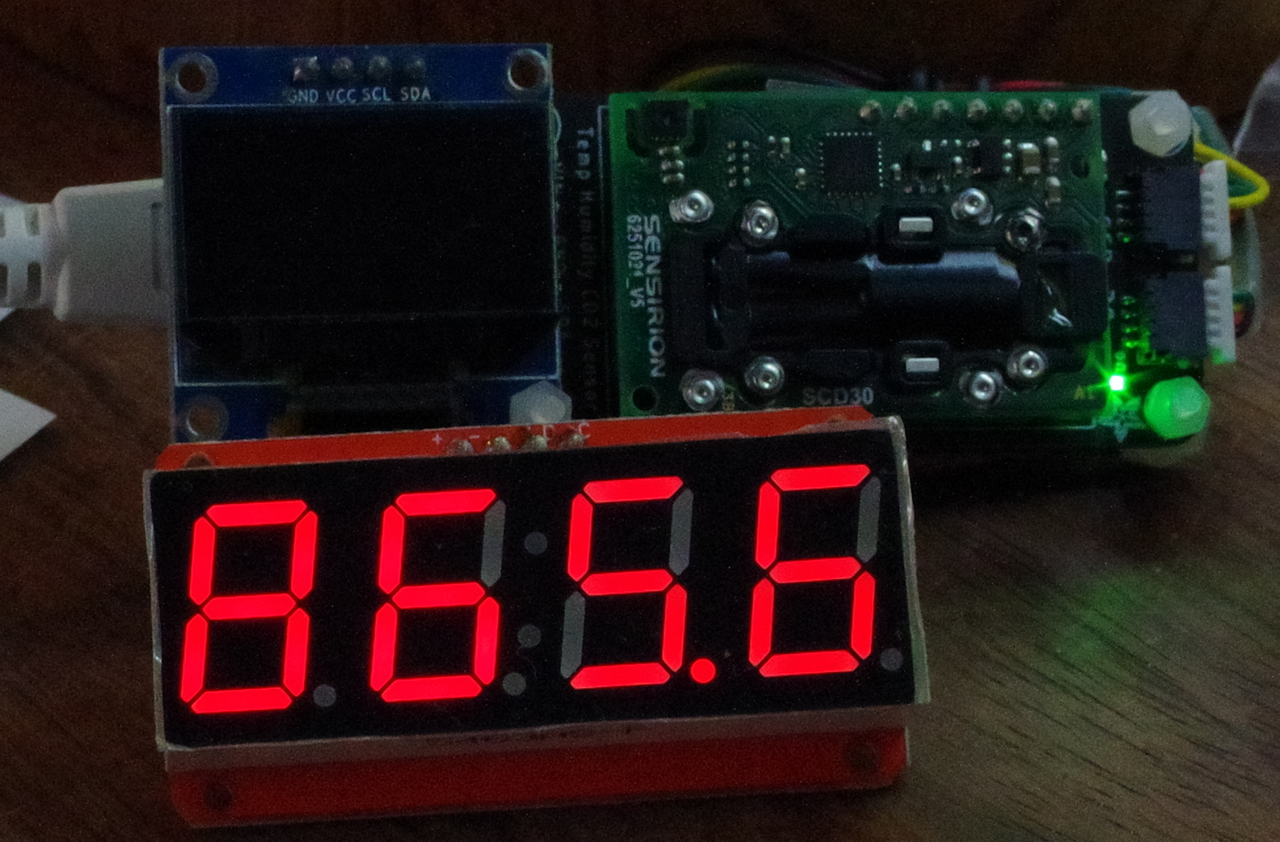
では、OLEDディスプレイに、測定したCO2の値を表示しました。遠くからは読み取りにくいので、同じI2Cバスにつなげて表示のできる7セグメントLEDに表示を変更します。4桁です。通常500~2000ppmの濃度なので、桁数は十分だと思います。
●コントローラはHT16K33
4桁7セグメントLEDボードのコントローラはHT16K33の製品を使いました。アマゾンで入手したものです。
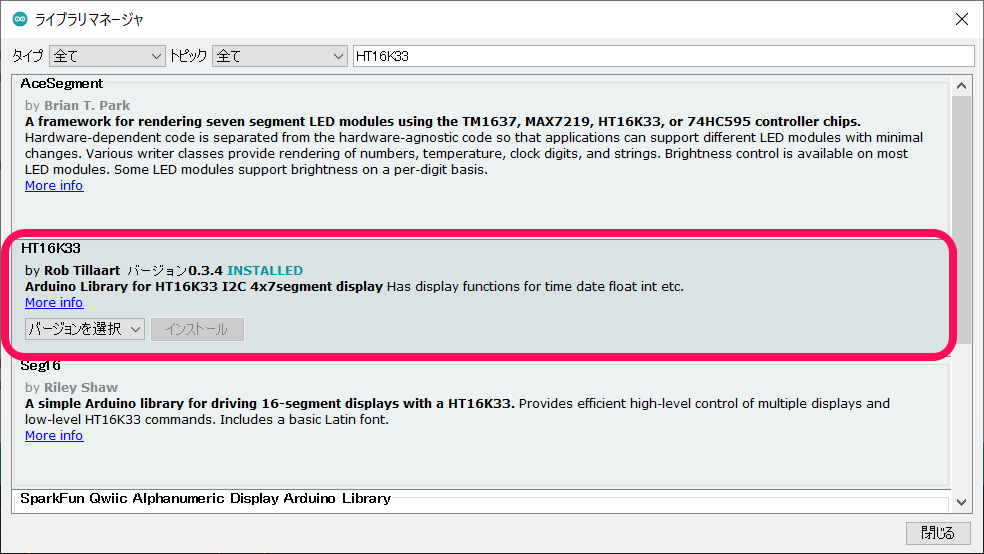
ライブラリを管理でHT16K33を検索欄に入れます。RobTillaart/HT16K33のライブラリを利用します。
サンプルのdemo1.inoを動かし、必要な記述を第8回のプログラムに組み込みます。
●スケッチ
/*
    Based on Neil Kolban example for IDF: https://github.com/nkolban/esp32-snippets/blob/master/cpp_utils/tests/BLE%20Tests/SampleServer.cpp
    Ported to Arduino ESP32 by Evandro Copercini
    updates by chegewara
*/

#include <BLEDevice.h>
#include <BLEUtils.h>
#include <BLEServer.h>

BLEServer *pServer = NULL;
BLECharacteristic * pTxCharacteristic;
bool deviceConnected = false;
bool oldDeviceConnected = false;
uint32_t txValue = 0;

#include "HT16K33.h"
HT16K33 seg(0x70);

// See the following for generating UUIDs:
// https://www.uuidgenerator.net/

#define SERVICE_UUID           "6E400001-B5A3-F393-E0A9-E50E24DCCA9E" // UART service UUID
#define CHARACTERISTIC_UUID_TX "6E400003-B5A3-F393-E0A9-E50E24DCCA9E"

class MyServerCallbacks: public BLEServerCallbacks {
    void onConnect(BLEServer* pServer) {
      deviceConnected = true;
    };

    void onDisconnect(BLEServer* pServer) {
      deviceConnected = false;
    }
};

#include <Adafruit_SCD30.h>
Adafruit_SCD30  scd30;
float CO2 = 0;

float readSCD30() {
  if (scd30.dataReady()){
    if (!scd30.read()){ Serial.println("Error reading sensor data"); return -1; }
      return scd30.CO2;
  }
}

void setup() {
  Serial.begin(115200);
  while (!Serial);
  Serial.println("Starting BLE work!");

  seg.begin();
  seg.displayOn();
  seg.brightness(2);
  seg.displayClear();

  if (!scd30.begin()) {
    Serial.println("Failed to find SCD30 chip");
    while (1) { delay(10); }
  }

  BLEDevice::init("ESP32 SCD30_CO2_UART");  // local name
  pServer = BLEDevice::createServer();  // Create the BLE Device
  pServer->setCallbacks(new MyServerCallbacks());

  BLEService *pService = pServer->createService(SERVICE_UUID);  // Create the BLE Service
  // Create a BLE Characteristic
  pTxCharacteristic = pService->createCharacteristic(
                    CHARACTERISTIC_UUID_TX,
                    BLECharacteristic::PROPERTY_NOTIFY
                  );

  pService->start();  // Start the service
  // Start advertising
  pServer->getAdvertising()->start();
  Serial.println("Waiting a client connection to notify...");
}

void loop() {
  Serial.print("\n--CO2 ");
  float CO2 = readSCD30();
  Serial.print(CO2);Serial.println("ppm");
  txValue = (int)CO2;

  if (deviceConnected) {
        pTxCharacteristic->setValue(txValue);
        pTxCharacteristic->notify();
    delay(10); // bluetooth stack will go into congestion, if too many packets are sent
  }

    // disconnecting
    if (!deviceConnected && oldDeviceConnected) {
        delay(500); // give the bluetooth stack the chance to get things ready
        pServer->startAdvertising(); // restart advertising
        Serial.println("start advertising");
        oldDeviceConnected = deviceConnected;
    }
    // connecting
    if (deviceConnected && !oldDeviceConnected) {
    // do stuff here on connecting
        oldDeviceConnected = deviceConnected;
    }
   seg.displayClear();
   seg.displayFloat(CO2);
   delay(2000);
}
実行中の様子です。