初めてのBLE (8) micro:bitでペリフェラル⑤UART温度をArduinoセントラルで受け取る
キャラの温度は読み出すだけでよかったのですが、UARTサービスは、サーバの立場であるペリフェラルとクライアントの立場であるセントラル間でデータのやり取りが発生します。UARTの受信例はペリフェラルのサンプル・スケッチのLEDControlをベースに、送信の例はSensorTagButtonをベースにスケッチを作っていきます。
ペリフェラルを動作させているのは、Arduino Nano 33 BLE Senseです。
●受信のスケッチ
LEDのON/OFFは一部残しました。
scanForUuid()はUARTサービスを探してこれなかったので、scanForName()に変更しました。
ON/OFFするために、ledCharacteristic.writeValue()は1バイトのデータを送っていましたが、文字列データに変更しました。デリミタは「:」です。
つながったら、2番ピンは出力をLowに初期設定しているので、123:を送ります。2番ピンをGNDにつないで離すとBLE:が送られ、LEDに表示が出ます。
#include  <ArduinoBLE.h>

#define localNAME "BBC micro:bit [gavag]"
#define serviceUUID "6e400001-b5a3-f393-e0a9-e50e24dcca9e" // UART
#define characteristicTxUUID "6e400002-b5a3-f393-e0a9-e50e24dcca9e"  // Tx
#define characteristicRxUUID "6e400003-b5a3-f393-e0a9-e50e24dcca9e"  // Rx
#define ButtonPressed  "123:"
#define ButtonReleased  "BLE:"

// variables for button
const int buttonPin = 2;
int oldButtonState = LOW;

void setup() {
  Serial.begin(9600);
  while (!Serial);

  // configure the button pin as input
  pinMode(buttonPin, INPUT);

  // initialize the BLE hardware
  BLE.begin();

  Serial.println("start BLE Central - UART control");

  // start scanning for peripherals
//  BLE.scanForUuid("6E400001-B5A3-F393-E0A9-E50E24DCCA9E");  // BLE UART Service
  BLE.scanForName(localNAME);
}

void loop() {
  // check if a peripheral has been discovered
  BLEDevice peripheral = BLE.available();

  if (peripheral) {
    // discovered a peripheral, print out address, local name, and advertised service
    Serial.print("Found ");
    Serial.print(peripheral.address());
    Serial.print(" '");
    Serial.print(peripheral.localName());
    Serial.print("' ");
    Serial.print(peripheral.advertisedServiceUuid());
    Serial.println();

    if (peripheral.localName() != localNAME) {
      return;
    }

    // stop scanning
    BLE.stopScan();

    controlLed(peripheral);

    // peripheral disconnected, start scanning again
//    BLE.scanForUuid(serviceUUID);  // BLE UART Service
  BLE.scanForName(localNAME);

  }
}

void controlLed(BLEDevice peripheral) {
  // connect to the peripheral
  Serial.println("Connecting ...");

  if (peripheral.connect()) {
    Serial.println("Connected");
  } else {
    Serial.println("Failed to connect!");
    return;
  }

  // discover peripheral attributes
  Serial.println("Discovering attributes ...");
  if (peripheral.discoverAttributes()) {
    Serial.println("Attributes discovered");
  } else {
    Serial.println("Attribute discovery failed!");
    peripheral.disconnect();
    return;
  }
  // retrieve the LED characteristic
  BLECharacteristic ledCharacteristic = peripheral.characteristic(characteristicRxUUID);
  if (!ledCharacteristic) {
    Serial.println("Peripheral does not have LED characteristic!");
    peripheral.disconnect();
    return;
  } else if (!ledCharacteristic.canWrite()) {
    Serial.println("Peripheral does not have a writable LED characteristic!");
    peripheral.disconnect();
    return;
  }

  while (peripheral.connected()) {
    // while the peripheral is connected

    // read the button pin
    int buttonState = digitalRead(buttonPin);

    if (oldButtonState != buttonState) {
      // button changed
      oldButtonState = buttonState;

      if (buttonState) {
        Serial.println(ButtonPressed);

        // button is pressed, write 0x01 to turn the LED on
        ledCharacteristic.writeValue(ButtonPressed, 4);  // send 123:
      } else {
        Serial.println(ButtonReleased);

        // button is released, write 0x00 to turn the LED off
        ledCharacteristic.writeValue(ButtonReleased, 4);  // send BLE:
      }
    }
  }

  Serial.println("Peripheral disconnected");
}
シリアルモニタの様子です。実験を中断していても、2ピンを触ると、すぐに再接続してくれました。

●送信のスケッチ
サンプル・スケッチSensorTagButtonをベースに修正します。
#include  <ArduinoBLE.h>

#define localNAME "BBC micro:bit [gavag]"
#define serviceUUID "6e400001-b5a3-f393-e0a9-e50e24dcca9e" // UART
#define characteristicTxUUID "6e400002-b5a3-f393-e0a9-e50e24dcca9e"  // Tx
#define characteristicRxUUID "6e400003-b5a3-f393-e0a9-e50e24dcca9e"  // Rx

void setup() {
  Serial.begin(9600);
  while (!Serial);

  // begin initialization
  if (!BLE.begin()) {
    Serial.println("starting BLE failed!");

    while (1);
  }

  Serial.println("start BLE Central - UART A button");
  Serial.println("Make sure to turn on the device.");

  // start scanning for peripheral
  BLE.scan();
}

void loop() {
  // check if a peripheral has been discovered
  BLEDevice peripheral = BLE.available();

  if (peripheral) {
    // discovered a peripheral, print out address, local name, and advertised service
    Serial.print("Found ");
    Serial.print(peripheral.address());
    Serial.print(" '");
    Serial.print(peripheral.localName());
    Serial.print("' ");
    Serial.print(peripheral.advertisedServiceUuid());
    Serial.println();

    // Check if the peripheral is a SensorTag, the local name will be:
    // "CC2650 SensorTag"
    if (peripheral.localName() == localNAME) {
      // stop scanning
      BLE.stopScan();

      monitorSensorTagButtons(peripheral);

      // peripheral disconnected, start scanning again
      BLE.scan();
    }
  }
}

void monitorSensorTagButtons(BLEDevice peripheral) {
  // connect to the peripheral
  Serial.println("Connecting ...");
  if (peripheral.connect()) {
    Serial.println("Connected");
  } else {
    Serial.println("Failed to connect!");
    return;
  }

  // discover peripheral attributes
  Serial.println("Discovering service UART ...");
  if (peripheral.discoverService(serviceUUID)) {
    Serial.println("Service discovered");
  } else {
    Serial.println("Attribute discovery failed.");
    peripheral.disconnect();

    while (1);
    return;
  }

  // retrieve the simple key characteristic
  BLECharacteristic simpleKeyCharacteristic = peripheral.characteristic(characteristicTxUUID);

  // subscribe to the simple key characteristic
  Serial.println("Subscribing to simple key characteristic ...");
  if (!simpleKeyCharacteristic) {
    Serial.println("no simple key characteristic found!");
    peripheral.disconnect();
    return;
  } else if (!simpleKeyCharacteristic.canSubscribe()) {
    Serial.println("simple key characteristic is not subscribable!");
    peripheral.disconnect();
    return;
  } else if (!simpleKeyCharacteristic.subscribe()) {
    Serial.println("subscription failed!");
    peripheral.disconnect();
    return;
  } else {
    Serial.println("Subscribed");
    Serial.println("Press the A buttons on your micro:bit.");
  }

  while (peripheral.connected()) {
    // while the peripheral is connected

    // check if the value of the simple key characteristic has been updated
    if (simpleKeyCharacteristic.valueUpdated()) {
      // yes, get the value, characteristic is 1 byte so use byte value
      byte value[2] ;

      simpleKeyCharacteristic.readValue(value,2);
      printData(value,2);
      Serial.println();
    }
  }

  Serial.println("SensorTag disconnected!");
}

void printData(const unsigned char data[], int length) {
  for (int i = 0; i < length; i++) {
    unsigned char b = data[i];
    if (b < 16) {
      Serial.print("0");
    }
    //Serial.print(b, HEX);Serial.print(" ");
   Serial.print((b-48), HEX);
  }
}
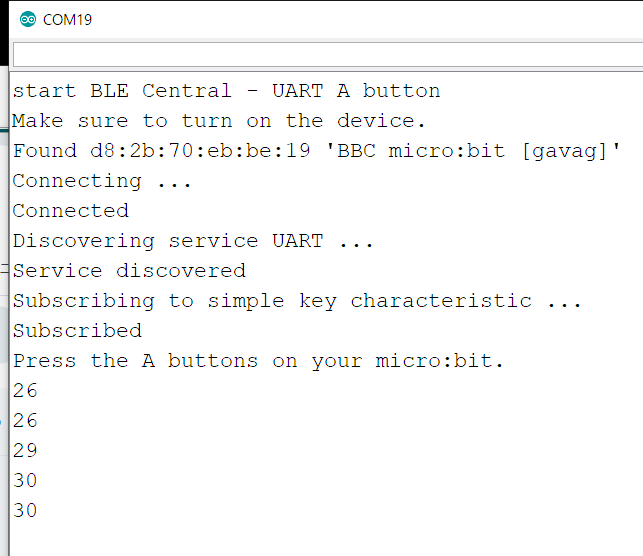
シリアルモニタの様子です。micro:bitのCPU上に指を載せて、ボタンAを押しています。
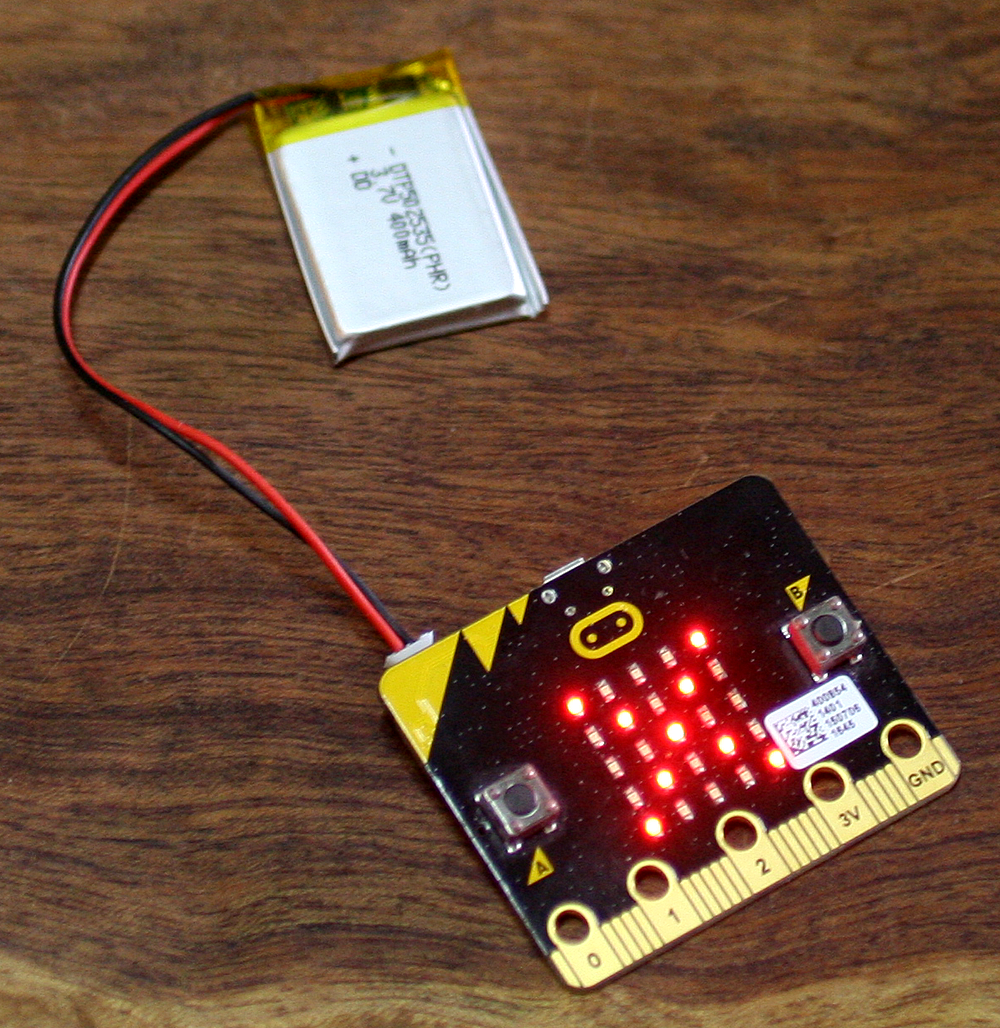
セントラルのmicro:bitはバッテリで動かしています。