Arduino UNO R4 Minimaでセンサ・インターフェーシング ⑩ 温度センサ MCP9808
Adafruitから入手した半導体温度センサMCP9808(マイクロチップ)を利用します。
●AdafruitのStemma QT/Qwiicボード
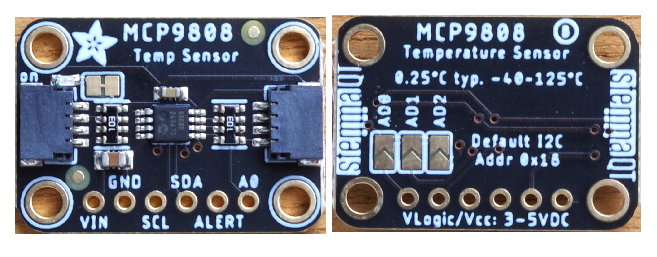
Stemma QT/Qwiic(JST SH 4ピン)コネクタは2か所に装着されていて、どちらにつないでもかまいません。このコネクタを使ってI2Cで制御する場合、特に、ジャンパ線をつなぐなどは不要です。
コネクタは、表と裏のどちらも差し込めそうですが、ピンが内部の上部に並んでいるので、差し込める方向は一意です。ロック機構はないですが、すぐに抜けるということはありません。
●温湿度センサMCP9808のおもなスペック
- 動作電圧 2.2~5.5V
- 動作電流 200µA typ
- 温度の確度 ±0.25°C type(-40~+125°C)、±0.5°C max(-20~+100°C)
- 確度 ±0.25 °C
- 分解能 16 bit(0.0625°C)
- 変換時間 250ms(0.0625℃/bit)
- インターフェース I2C(0~400kHz)
●使用環境
- Arduino UNO R4 Minima
- Arduino IDE 2.1.1
- Windows10 22H2
●接続
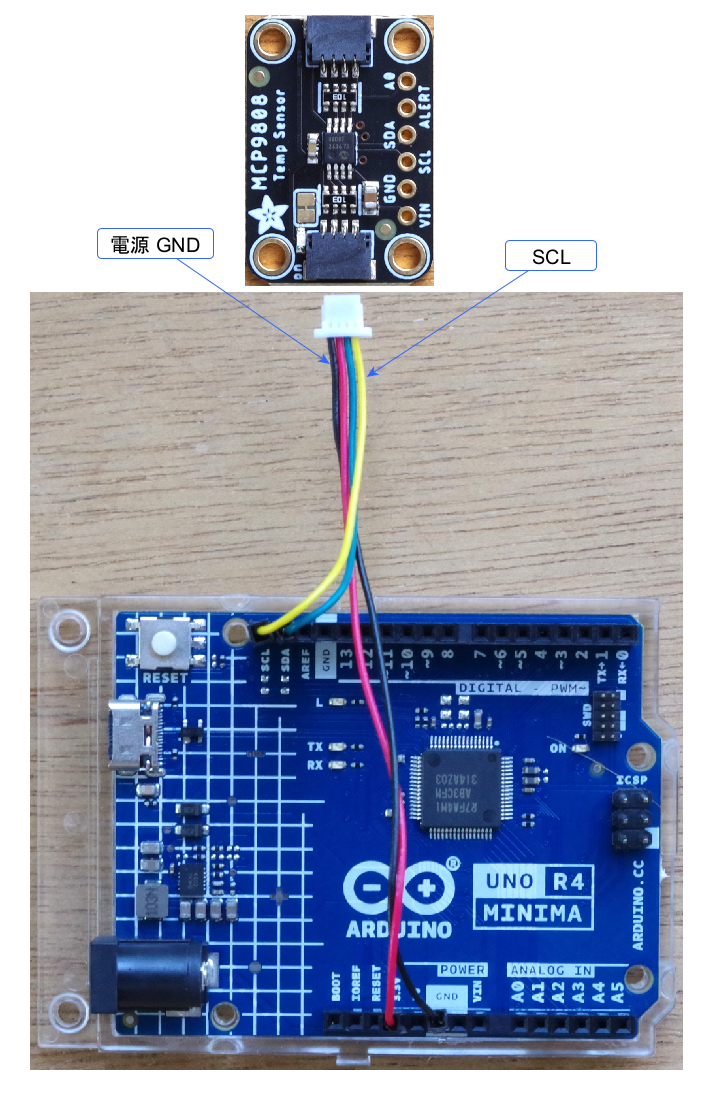
Arduino UNO R4 MinimaのI2C信号とセンサをJSTコネクタでつなぎます(Stemma QT/Qwiicボードの写真の比率は異なる)。
●スレーブ・アドレスを確認
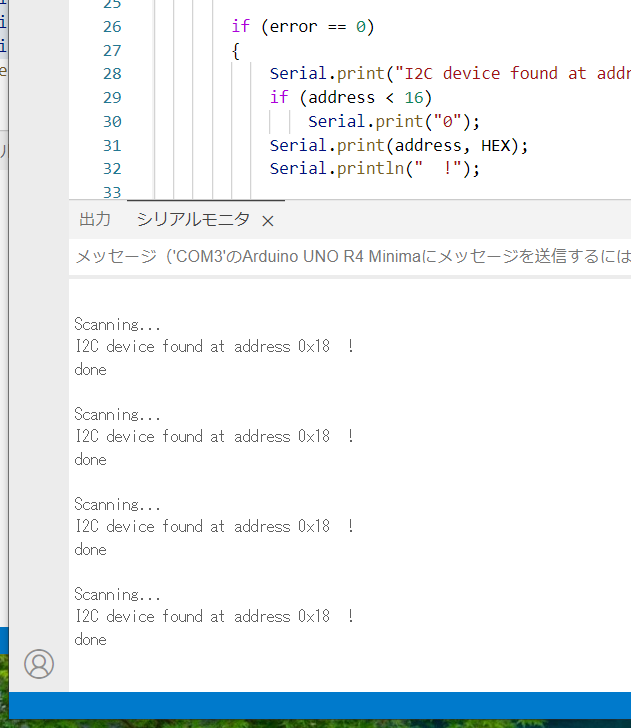
従来からよく使われているi2cScanner.inoを動かしてスレーブ・アドレスを確認します。電源は5Vです。
0x18を見つけてきました。
以降のスケッチは3.3Vで動作させます。
ボードにある三つのジャンパによって、下記のようにアドレスを変更できます。
| A00 | A01 | A02 | スレーブ・アドレス |
|---|---|---|---|
| - | - | - | 0x18(デフォルト) |
| - | - | ショート | 0x19 |
| - | ショート | ショート | 0x1b |
| ショート | ショート | ショート | 0x1f |
| - | ショート | - | 0x1a |
| ショート | ショート | - | 0x1e |
| ショート | - | - | 0x1c |
| ショート | - | ショート | 0x1d |
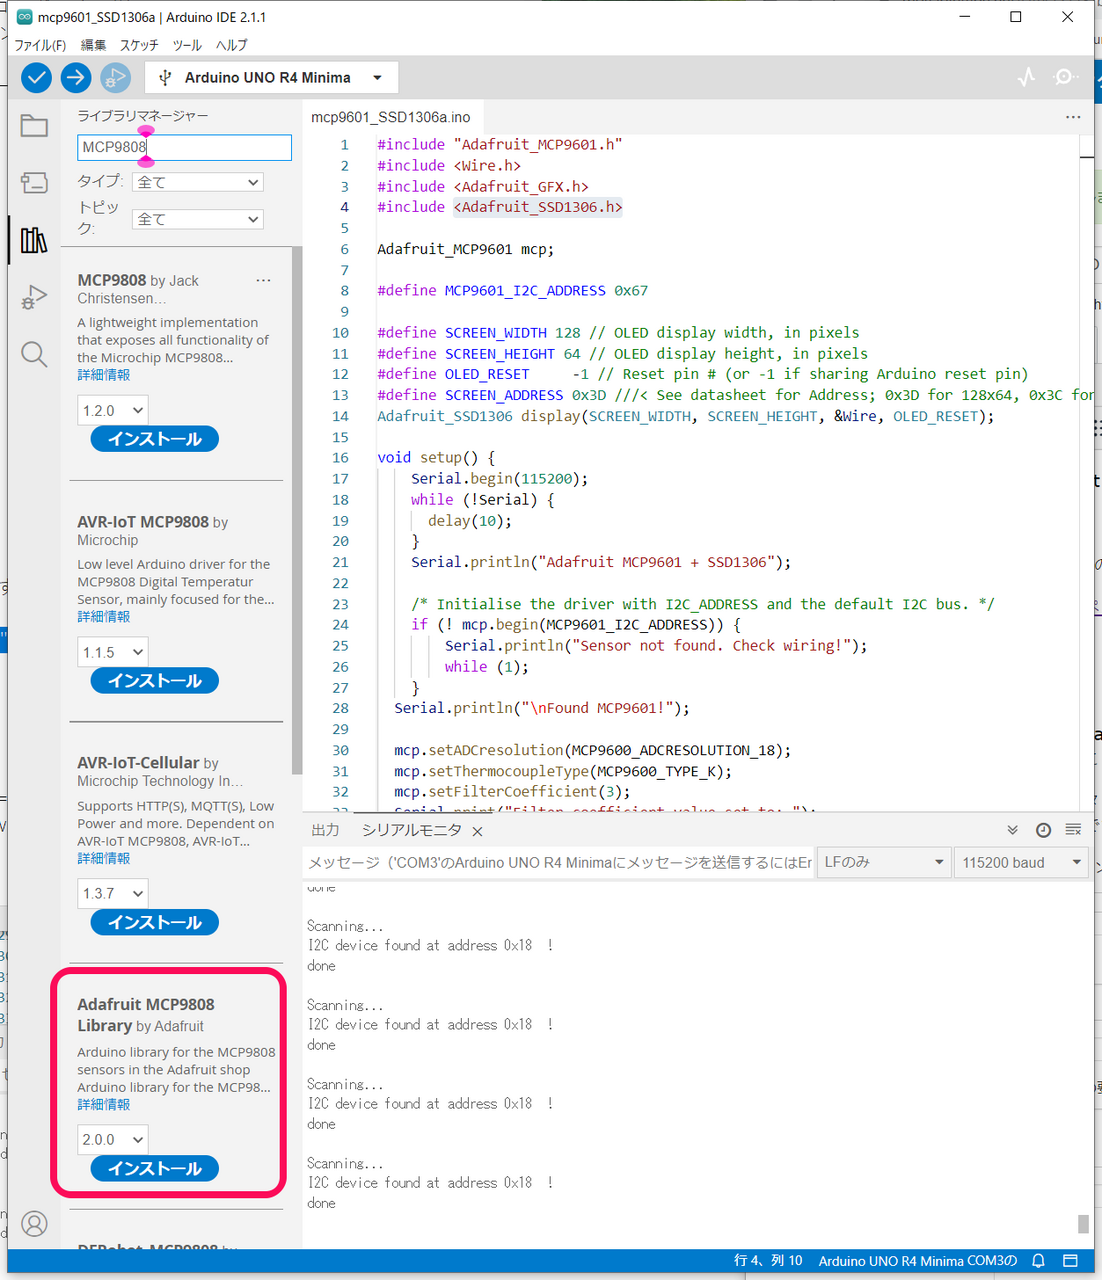
●ライブラリの用意
MCP9808で検索して、見つかったAdafruit MCP9808ライブラリをインストールします。
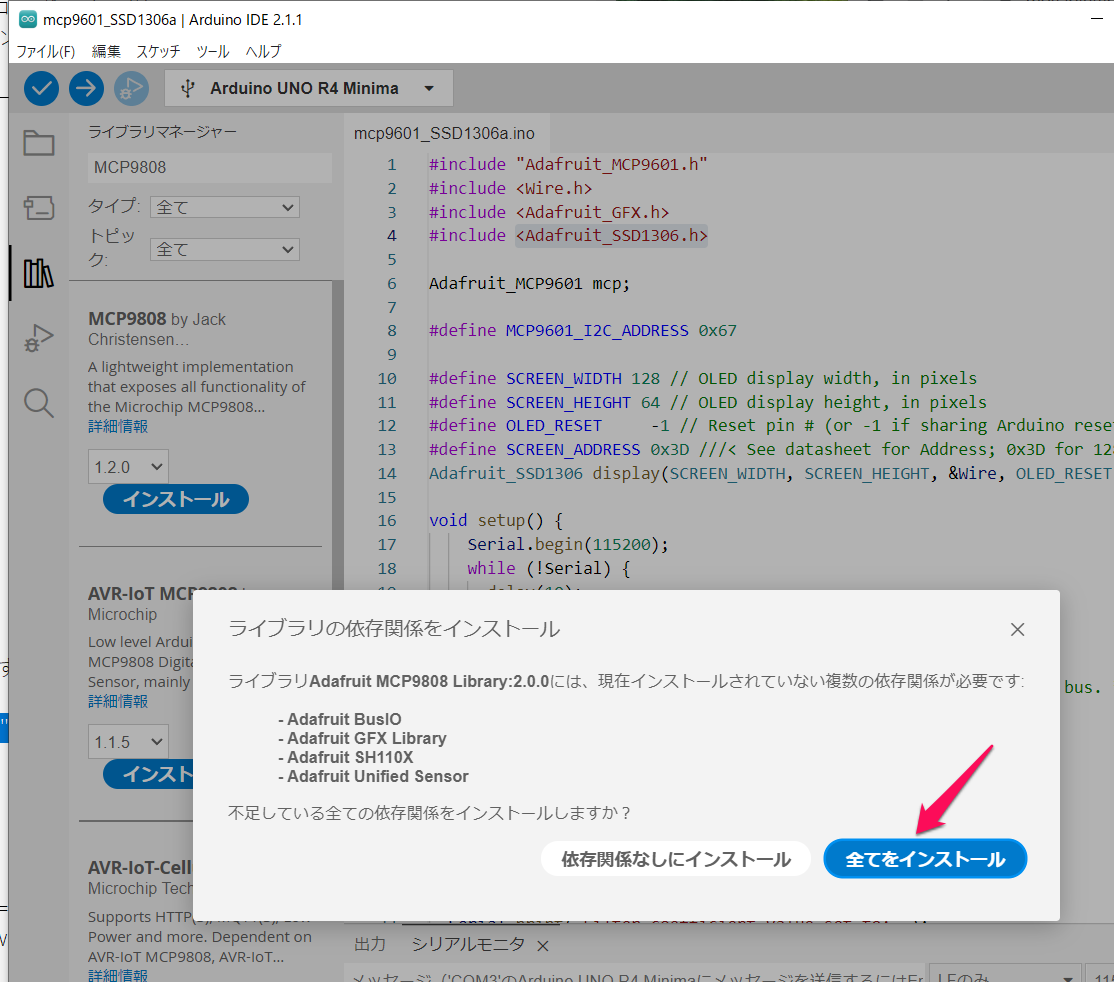
インストールを始めると次のパネルが出ました。
全てをインストールを選びました。
●サンプル・スケッチ
メニューのファイル->スケッチ例から、Adafruit MCP9808 Libraryのmcp9808test.inoを選択し、
コンパイル、実行します。
//  http://www.adafruit.com/products/1782
#include <Wire.h>
#include "Adafruit_MCP9808.h"

Adafruit_MCP9808 tempsensor = Adafruit_MCP9808();

void setup() {
  Serial.begin(9600);
  while (!Serial); //waits for serial terminal to be open, necessary in newer arduino boards.
  Serial.println("MCP9808 demo");

  //  A2 A1 A0 =  0  0  0   0x18  this is the default address
  if (!tempsensor.begin(0x18)) {
    Serial.println("Couldn't find MCP9808! Check your connections and verify the address is correct.");
    while (1);
  }
    Serial.println("Found MCP9808!");

  tempsensor.setResolution(3); // sets the resolution mode of reading = 3 0.0625°C    250 ms
}

void loop() {
  tempsensor.wake();   // wake up, ready to read!
  float c = tempsensor.readTempC();
  Serial.print("Temp: ");
  Serial.print(c, 4); Serial.print("*C");
  delay(2000);
  tempsensor.shutdown_wake(1); // shutdown MSP9808 - power consumption ~0.1 mikro Ampere, stops temperature sampling
  Serial.println("\n");
  delay(200);
}
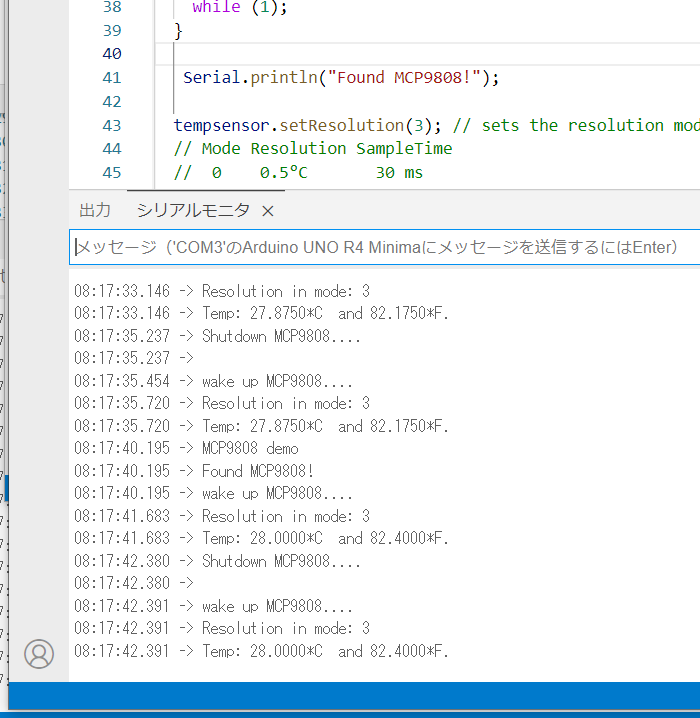
実行例です。
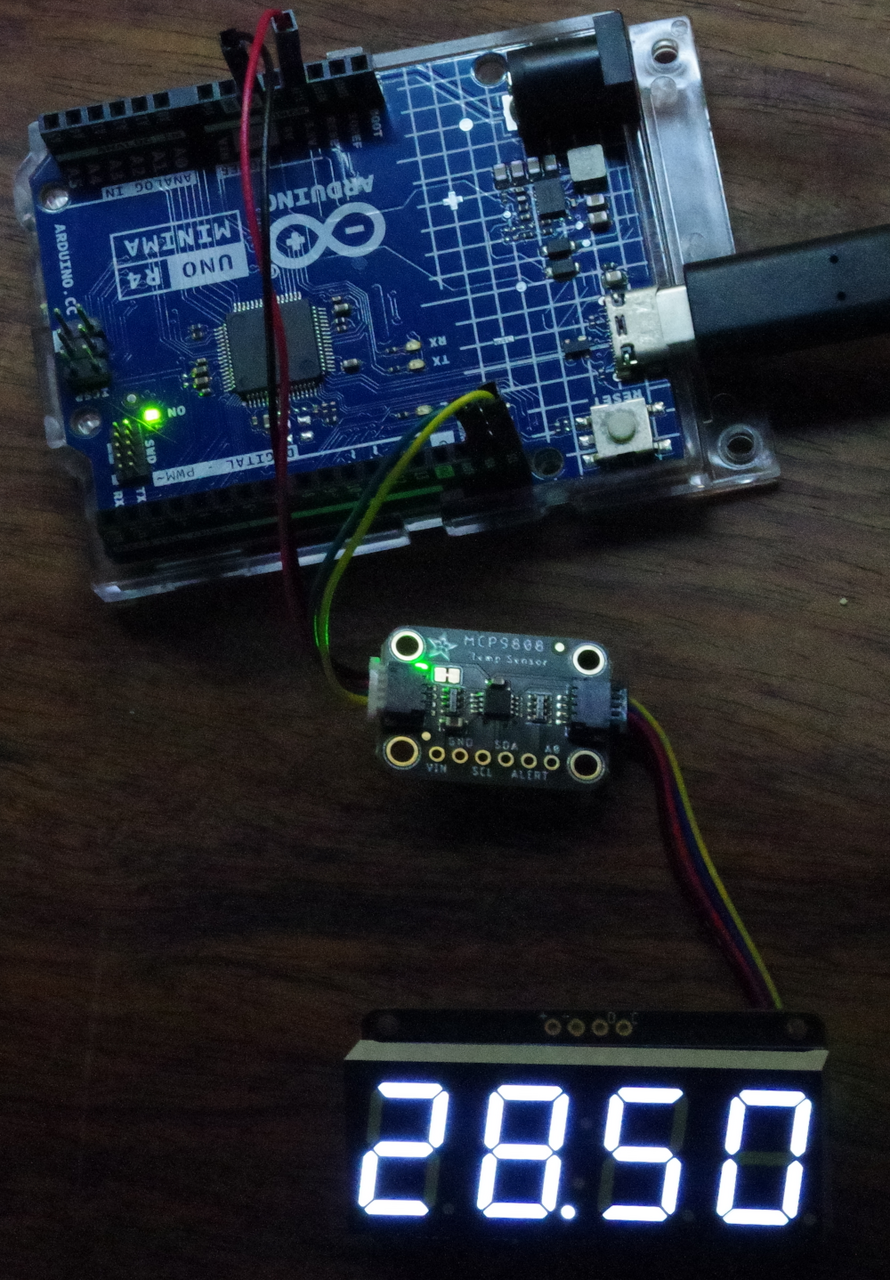
●4桁の7セグメントLED表示をつないで測定結果を表示する
連載の第4回目の記事を参照しながら表示器を接続します。
Arduino UNO R4 Minimaでセンサ・インターフェーシング ④ 温湿度センサSi7021の測定結果を7セグメントLEDに表示
スケッチです。
//  http://www.adafruit.com/products/1782
#include <Wire.h>
#include "Adafruit_MCP9808.h"
#include <Adafruit_GFX.h>
#include "Adafruit_LEDBackpack.h"

Adafruit_MCP9808 tempsensor = Adafruit_MCP9808();
Adafruit_7segment matrix = Adafruit_7segment();

void setup() {
  Serial.begin(9600);
  while (!Serial); //waits for serial terminal to be open, necessary in newer arduino boards.
  Serial.println("MCP9808  + 7segment LED");

  //  A2 A1 A0 =  0  0  0   0x18  this is the default address
  if (!tempsensor.begin(0x18)) {
    Serial.println("Couldn't find MCP9808! Check your connections and verify the address is correct.");
    while (1);
  }
    Serial.println("Found MCP9808!");

  tempsensor.setResolution(3); // sets the resolution mode of reading = 3 0.0625°C    250 ms
   matrix.begin(0x70);
  matrix.setBrightness(0x05);  // default 0x0
}

void loop() {
  tempsensor.wake();   // wake up, ready to read!
  float c = tempsensor.readTempC();
  Serial.print("Temp: ");
  Serial.print(c, 4); Serial.print("*C");

  matrix.print(c,2);
  matrix.writeDisplay();

  delay(2000);
  tempsensor.shutdown_wake(1); // shutdown MSP9808 - power consumption ~0.1 mikro Ampere, stops temperature sampling
  Serial.println("\n");
  delay(200);
}
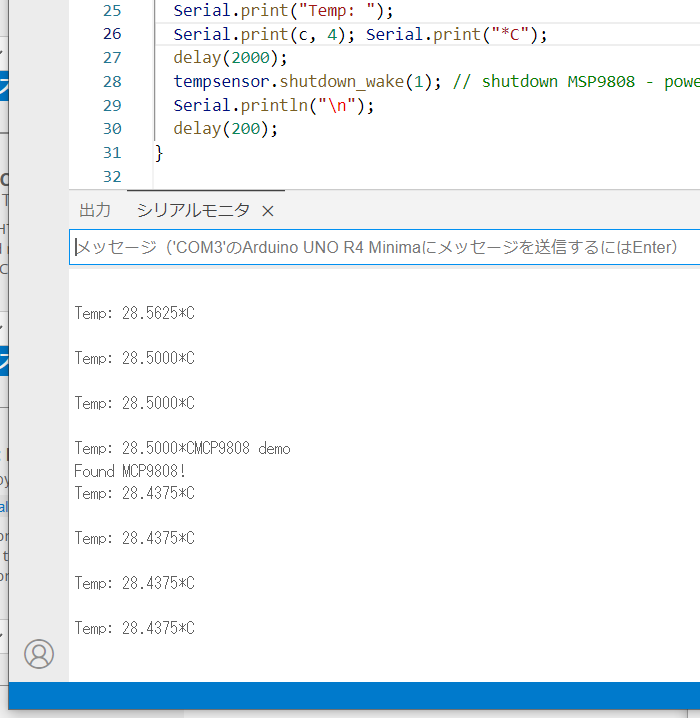
実行例です。
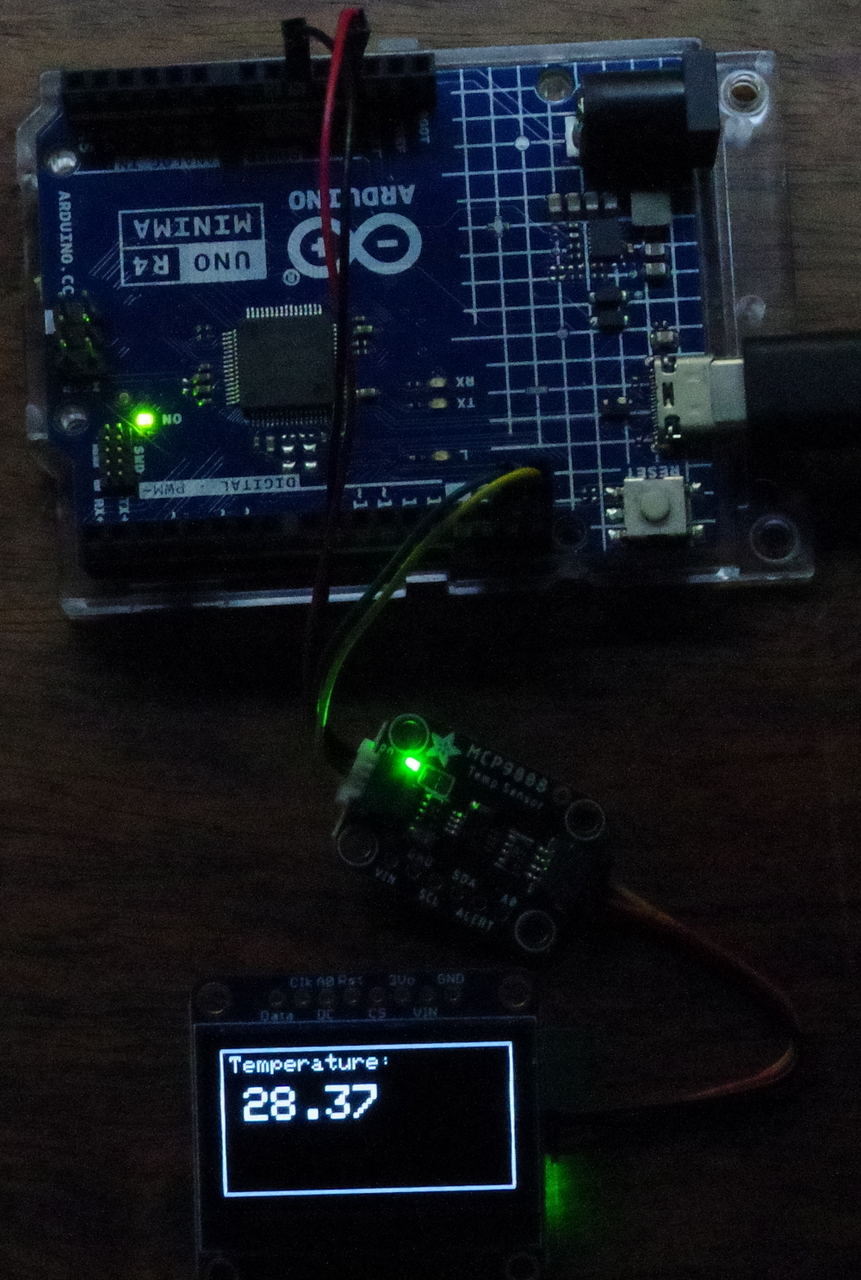
●グラフィック・ディスプレイに測定結果を表示
次の記事を参考に、グラフィック・ディスプレイに測定した温度を表示します。
Arduino UNO R4 Minimaでセンサ・インターフェーシング ⑤ 温湿度センサSi7021の測定結果をグラフィック・ディスプレイに表示
スケッチです。
//  http://www.adafruit.com/products/1782
#include <Wire.h>
#include "Adafruit_MCP9808.h"
#include <Adafruit_GFX.h>
#include <Adafruit_SSD1306.h>

Adafruit_MCP9808 tempsensor = Adafruit_MCP9808();

#define SCREEN_WIDTH 128 // OLED display width, in pixels
#define SCREEN_HEIGHT 64 // OLED display height, in pixels
#define OLED_RESET     -1 // Reset pin # (or -1 if sharing Arduino reset pin)
#define SCREEN_ADDRESS 0x3D ///< See datasheet for Address; 0x3D for 128x64, 0x3C for 128x32
Adafruit_SSD1306 display(SCREEN_WIDTH, SCREEN_HEIGHT, &Wire, OLED_RESET);

void setup() {
    Serial.begin(115200);
    while (!Serial) {
      delay(10);
    }
    Serial.println("MCP9808 + SSD1306");

  //  A2 A1 A0 =  0  0  0   0x18  =  default address
  if (!tempsensor.begin(0x18)) {
    Serial.println("Couldn't find MCP9808! Check your connections and verify the address is correct.");
    while (1);
  }
    Serial.println("Found MCP9808!");

  tempsensor.setResolution(3); // sets the resolution mode of reading = 3 0.0625°C    250 m

  display.begin(SSD1306_SWITCHCAPVCC, SCREEN_ADDRESS);
  display.clearDisplay();
  display.drawRect(0, 0, display.width(), display.height(), SSD1306_WHITE);
  display.setTextSize(1);                // Normal 1:1 pixel scale
  display.setTextColor(SSD1306_WHITE);   // Draw white text
  display.setCursor(4,3);
  display.println("Temperature:");
  display.display();
  delay(200);
}

void loop() {
  tempsensor.wake();   // wake up, ready to read!
  float Temperature = tempsensor.readTempC();
  Serial.print("Temp: ");
  Serial.print(Temperature, 4); Serial.print("*C");

  display.setTextSize(2);             // Draw 2X-scale text
  display.setTextColor(SSD1306_WHITE);   // Draw white text
  display.setCursor(10,17);
  display.fillRect(10, 17, 70, 16, SSD1306_BLACK);
  display.println(Temperature);
  display.display();

  delay(5000);

  tempsensor.shutdown_wake(1); // shutdown MSP9808 - power consumption ~0.1 mikro Ampere, stops temperature sampling
  Serial.println("\n");
  delay(200);
}
実行例です。