Groveで広がるArduinoの世界-Senser Kit-⑤ Grove Barometer Sensor (BMP280)
ボッシュのBMP280は気圧センサです。MEMS(Micro Electro Mechanical Systems)センサでもあります。MEMSはとても小さな機構構造があり、ICを製造する技術の応用で作られます。アナログICやマイコンなどが一緒に封入された製品もあります。
気圧は温度で補正をするので、温度情報も同時に得られます。海水面の気圧を基準にして高度も計算できますが、補正しないとずれます。分解能は±1mです。
●BMP280のおもなスペック
- 電源電圧;1.71~3.6V
- 温度測定範囲;-40~+85℃、分解能0.01℃
- 気圧測定範囲;300~1100hPa、確度±1hPa、分解能0.12hPa
- インターフェース;SPI(データ転送速度最大10MHz)、I2C(データ転送速度最大3.4MHz)
- I2Cアドレス;0x76、0x77どちらかを選択
●回路
Grove - Barometer Sensor (BMP280)から、[Eagle] Grove-Barometer Sensor BMP280 Schematicに回路図のPDFがダウンロードできます。スレーブ・アドレスは0x77です。
Vcc(5V)から3.3Vを作るレギュレータICが入っています。BMP280は3.3Vで動作します。したがって、BMP280の信号のHIGHレベルは3.3Vです。MOSFETによるレベル変換回路が入っていて、3.3Vを5Vへ変換します。
したがって、Arduino UNOのディジタル入出力のレベルと一致します。
●接続
BMP280はI2CバスとSPIバスの両方をがサポートされています。このボードでは、I2Cバスを利用するので、GroveコネクタでI2Cと書かれたコネクタと接続します。ボードを切り離さないときは、何も接続せずともI2Cバスとつながっています。
I2CバスはSCLとSDAの信号をプルアップする必要があります。回路図を見ると10kΩでプルアップされていますが、実際にテスタで測ると1.88kΩありました。
OLEDディスプレイには4.7kのプルアップがありました。3-Axis Digital Accelerometeには10kのプルアップが入っているので、合成抵抗になります。
計算すると2.4kでした。もう1か所10kが入っていたら1.95kになります。
ラズパイが1.8kをプルアップしているので、並列にプルアップが合成された状態でも問題なく動くと思われます。
I2Cの規格書では、バスのスピードを上げるときは、抵抗値を低くするようにと書かれています。
| Groveピン番号 | I2Cバスの信号 |
|---|---|
| 4 | GND |
| 3 | Vcc |
| 2 | SDA |
| 1 | SCL |
●プログラム
THE AIR PRESSURE SENSORのページに掲載されているスケッチです。
#include "Arduino_SensorKit.h"

float pressure;

void setup() {
  Serial.begin(9600);
  Pressure.begin();
}

void loop() {
  // Get and print temperatures
  Serial.print("Temp: ");
  Serial.print(Pressure.readTemperature());
  Serial.println("C"); // The unit for  Celsius because        original arduino don't support speical symbols

  // Get and print atmospheric pressure data
  Serial.print("Pressure: ");
  Serial.print(Pressure.readPressure());
  Serial.println("Pa");

  // Get and print altitude data
  Serial.print("Altitude: ");
  Serial.print(Pressure.readAltitude());
  Serial.println("m");

  Serial.println("\n");//add a line between output of different times.

  delay(1000);
}
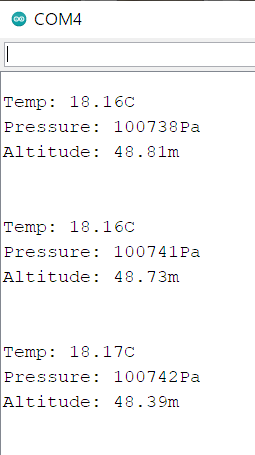
実行中の様子です。
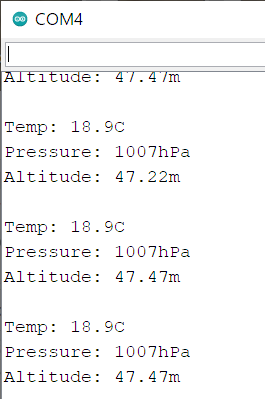
日本で気圧は補助単位系のhPaを使うので、100で割った値に変更します。ほかに、使っていない変数も削除します。
#include "Arduino_SensorKit.h"

void setup() {
  Serial.begin(9600);
  Pressure.begin();
}

void loop() {
  // Get and print temperatures
  Serial.print("\nTemp: ");
  Serial.print(Pressure.readTemperature(),1);
  Serial.println("C"); // The unit for  Celsius

  // Get and print atmospheric pressure data
  Serial.print("Pressure: ");
  Serial.print(Pressure.readPressure()/100);
  Serial.println("hPa");

  // Get and print altitude data
  Serial.print("Altitude: ");
  Serial.print(Pressure.readAltitude());
  Serial.println("m");

  delay(3000);
}
実行中の様子です。
●OLEDに表示
OLEDの表示が正しく更新できません。原因は不明です。シリアルモニタには、温度、湿度、気圧を表示しています。
#include "Arduino_SensorKit.h"
#define DHTPIN 3
#define light_sensor A3
#define button 2
//0x3c OLED
//0x77 BMP77
//0x19 MMA7660FC 0x4c?

void setup() {
  Serial.begin(9600);
  Serial.println("\nstart");
    Environment.begin();
    Pressure.begin();
    Oled.begin();
    Oled.setFlipMode(true); // Sets the rotation of the screen
    Oled.clear();
    Oled.setFont(u8x8_font_chroma48medium8_r);
    Oled.setCursor(0, 3);
    Oled.print("light:");
    Oled.setCursor(0, 4);
    Oled.print("Temp:");
    Oled.setCursor(0, 5);
    Oled.print("Humi:");
    Oled.setCursor(0, 6);
    Oled.print("Press:");

    pinMode(button, INPUT);
    //attachInterrupt(digitalPinToInterrupt(button), push, RISING);
}

void loop(){
  int raw_light;
  raw_light= analogRead(light_sensor); // read the raw value from light_sensor pin (A3)
  int light = map(raw_light, 0, 1023, 0, 100); // map the value from 0, 1023 to 0, 100

  Oled.noInverse();
  Oled.draw2x2String(9,0,"off ");
  Oled.setCursor(6, 3); Oled.print("    ");
  Oled.setCursor(6, 3); Oled.print(light);
  Oled.setCursor(6, 4); Oled.print("    ");
  Oled.setCursor(6, 4); Oled.print(Pressure.readTemperature(),1);
  Oled.setCursor(6, 5); Oled.print("    ");
  Oled.setCursor(6, 5); Oled.print(Environment.readHumidity(),0);
  Oled.setCursor(6, 6); Oled.print("    ");
  Oled.setCursor(6, 6); Oled.print(Pressure.readPressure()/100);
  Oled.refreshDisplay();    // Update the Display

Serial.println(Pressure.readPressure());
Serial.println(Pressure.readTemperature());
Serial.println(Environment.readHumidity());
  delay(500);
}

void push() {
  Oled.inverse();
  Oled.draw2x2String(9,0,"on ");
  delay(100);
  Oled.noInverse();
}