初めてのBLE (14) ESP32でペリフェラル②Nano 33 BLE Senseのセントラル
前回、ESP32でCPUの温度を送るペリフェラルを作成しました。
●セントラルの作成
セントラルをArduino Nano 33 BLE Senseで動作させます。ベースになるのは、第8回で作成したスケッチです。もともとサンプル・スケッチのLEDControlをベース改造していました。
localNAME が一致したら、キャラを読みに行きます。読み取ったデータは、今回は1byteだけですが、複数byteやfloatなどであっても、配列を使ったprintData()関数で印字します。
#include <ArduinoBLE.h>

#define SERVICE_UUID        "4fafc201-1fb5-459e-8fcc-c5c9c331914b"
#define CHARACTERISTIC_UUID "beb5483e-36e1-4688-b7f5-ea07361b26a8"
#define localNAME "ESP32 peripheral"

void setup() {
  Serial.begin(9600);
  while (!Serial);

  BLE.begin();
  Serial.println("\nstart BLE Central - CPU temp");
  // start scanning for peripherals
  BLE.scanForName(localNAME);
}

void loop() {
  // check if a peripheral has been discovered
  BLEDevice peripheral = BLE.available();

  if (peripheral) {
    // discovered a peripheral, print out address, local name, and advertised service
    Serial.print("Found ");
    Serial.print(peripheral.address());
    Serial.print(" '");
    Serial.print(peripheral.localName());
    Serial.print("' ");
    Serial.print(peripheral.advertisedServiceUuid());
    Serial.println();

    if (peripheral.localName() != localNAME) {
      return;
    }

    // stop scanning
    BLE.stopScan();

    controlLed(peripheral);

    // peripheral disconnected, start scanning again
    BLE.scanForName(localNAME);
  }
}

void controlLed(BLEDevice peripheral) {
  // connect to the peripheral
  Serial.print("Connecting ...");

  if (peripheral.connect()) {
    Serial.println("Connected");
  } else {
    Serial.println("Failed to connect!");
    return;
  }

  // discover peripheral attributes
  Serial.print("Discovering attributes ...");
  if (peripheral.discoverAttributes()) {
    Serial.println("Attributes discovered\n");
  } else {
    Serial.println("Attribute discovery failed!");
    peripheral.disconnect();
    return;
  }
  // retrieve the LED characteristic
  BLECharacteristic ledCharacteristic = peripheral.characteristic(CHARACTERISTIC_UUID);

  if (!ledCharacteristic) {
    Serial.println("Peripheral does not have LED characteristic!");
    peripheral.disconnect();
    return;
  } else if (!ledCharacteristic.canWrite()) {
    Serial.println("Peripheral does not have a writable LED characteristic!");
    peripheral.disconnect();
    return;
  }

  Serial.println("---Found CHARACTERISTIC_UUID");
  while (peripheral.connected()) {
  if (ledCharacteristic.canRead()) {
    // read the characteristic value
    ledCharacteristic.read();
    if (ledCharacteristic.valueLength() > 0) {
      // print out the value of the characteristic
      Serial.print("\nvalue 0x");
      printData(ledCharacteristic.value(), ledCharacteristic.valueLength());

      delay(5000);
    }
  }
}

  Serial.println("Peripheral disconnected");
}

void printData(const unsigned char data[], int length) {
  for (int i = 0; i < length; i++) {
    unsigned char b = data[i];
    if (b < 16) {
      Serial.print("0");
    }
    Serial.print(b, HEX);Serial.print("(");Serial.print(b);Serial.print(")");
  }
}
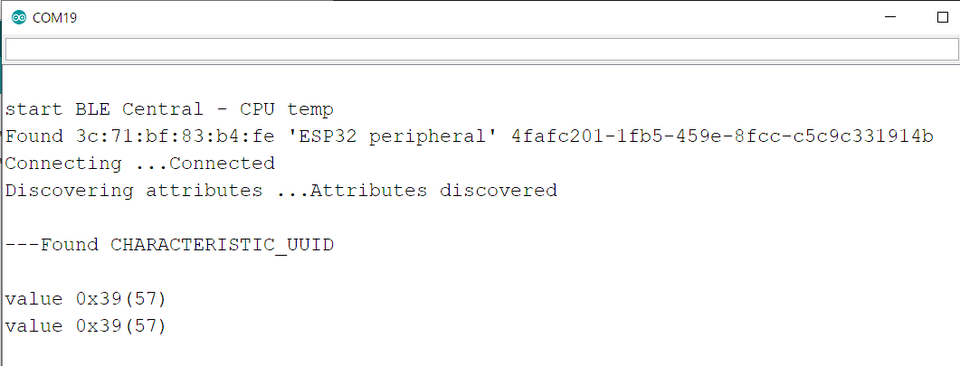
実行しました。57度でした。ペリフェラルではsetup()内で温度を送っているので、受信している57度はずっと変化しません。ペリフェラルをリセットすると、異なった温度になることもあります。
次回、loop()内で最新の温度値を送るように改造する予定です。
