Raspberry Pi Picoでプログラミング ⑨ i2cscanner
ラズパイのi2ctoolsにあるi2cdetectと同じものが、pico\pico-examples\build\i2c\bus_scanに入っています。最初に、このソースを利用して、i2cscannerを作ります。
●プログラム名はi2cscanner
pico/pico-examples/i2c/bus_scanフォルダをpico/worksフォルダへコピペし、i2cscannerという名前で保存します。
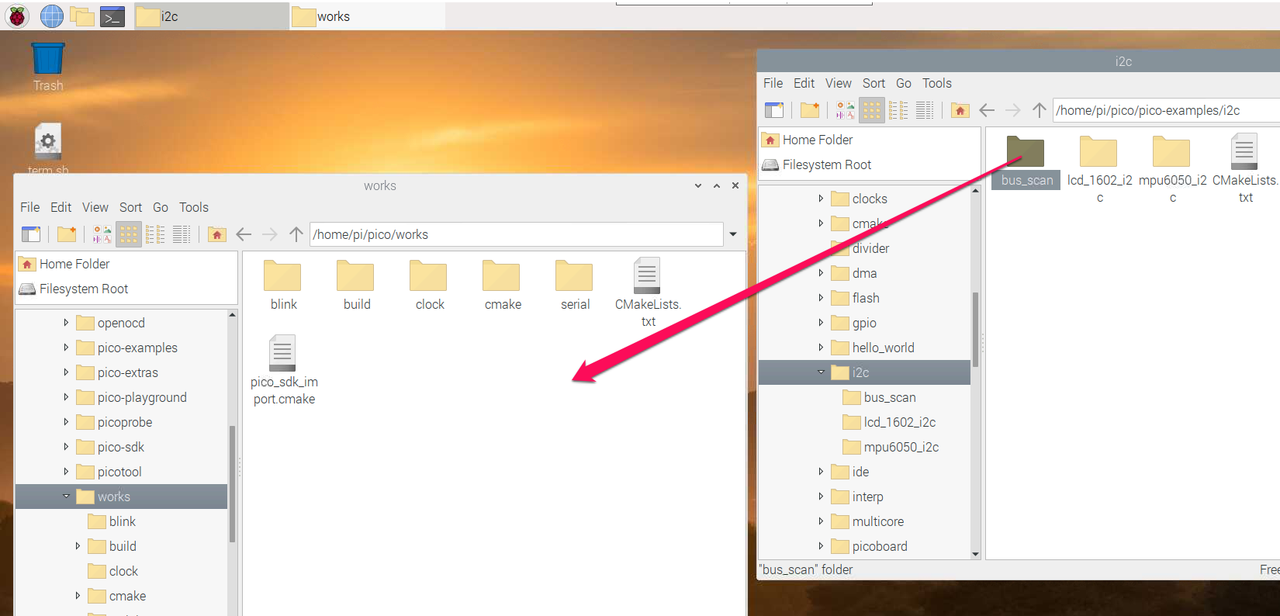
i2cscannerフォルダには、ソースのbus_scan.cとCMakeLists.txtが入っています。まず、CMakeLists.txtを修正します。
add_executable(i2cscanner
        bus_scan.c
        )

# Pull in our (to be renamed) simple get you started dependencies
target_link_libraries(i2cscanner pico_stdlib hardware_i2c)

# create map/bin/hex file etc.
pico_add_extra_outputs(i2cscanner)
つぎにbus_scan.cを次のように修正します。SCL、SDAのピンを変更、printf文を少し修正するだけです。
/**
 * Copyright (c) 2020 Raspberry Pi (Trading) Ltd.
 *
 * SPDX-License-Identifier: BSD-3-Clause
 */

// Sweep through all 7-bit I2C addresses, to see if any slaves are present on
// the I2C bus. Print out a table that looks like this:
//
// I2C Bus Scan
//   0  1  2  3  4  5  6  7  8  9  A  B  C  D  E  F
// 0
// 1       @
// 2
// 3             @
// 4
// 5
// 6
// 7
//
// E.g. if slave addresses 0x12 and 0x34 were acknowledged.

#include <stdio.h>
#include "pico/stdlib.h"
#include "pico/binary_info.h"
#include "hardware/i2c.h"

#define SDA_PIN 8  // GP8
#define SCL_PIN 9  // GP9

// I2C reserves some addresses for special purposes. We exclude these from the scan.
// These are any addresses of the form 000 0xxx or 111 1xxx
bool reserved_addr(uint8_t addr) {
    return (addr & 0x78) == 0 || (addr & 0x78) == 0x78;
}

int main() {
    // Enable UART so we can print status output
    stdio_init_all();
#if !defined(i2c_default) || !defined(PICO_DEFAULT_I2C_SDA_PIN) || !defined(PICO_DEFAULT_I2C_SCL_PIN)
#warning i2c/bus_scan example requires a board with I2C pins
    puts("Default I2C pins were not defined");
#else
    // This example will use I2C0 on the default SDA and SCL pins (4, 5 on a Pico)
    i2c_init(i2c_default, 100 * 1000);
    gpio_set_function(SDA_PIN, GPIO_FUNC_I2C);
    gpio_set_function(SCL_PIN, GPIO_FUNC_I2C);
    gpio_pull_up(SDA_PIN);
    gpio_pull_up(SCL_PIN);
    // Make the I2C pins available to picotool
    bi_decl(bi_2pins_with_func(SDA_PIN, SCL_PIN, GPIO_FUNC_I2C));

    printf("\nI2C Bus Scan. SDA=GP%d SCL=GP%d\n", SDA_PIN, SCL_PIN);
    printf("   0  1  2  3  4  5  6  7  8  9  A  B  C  D  E  F\n");

    for (int addr = 0; addr < (1 << 7); ++addr) {
        if (addr % 16 == 0) {
            printf("%02x ", addr);
        }

        // Perform a 1-byte dummy read from the probe address. If a slave
        // acknowledges this address, the function returns the number of bytes
        // transferred. If the address byte is ignored, the function returns
        // -1.

        // Skip over any reserved addresses.
        int ret;
        uint8_t rxdata;
        if (reserved_addr(addr))
            ret = PICO_ERROR_GENERIC;
        else
            ret = i2c_read_blocking(i2c0, addr, &rxdata, 1, false);

        printf(ret < 0 ? "." : "@");
        printf(addr % 16 == 15 ? "\n" : "  ");
    }
    printf("Done.\n");
    return 0;
#endif
}
pico/worksにあるCMakeLists.txtを次のように修正します。
cmake_minimum_required(VERSION 3.12)

# Pull in SDK (must be before project)
include(pico_sdk_import.cmake)

project(pico_examples C CXX ASM)
set(CMAKE_C_STANDARD 11)
set(CMAKE_CXX_STANDARD 17)

set(PICO_EXAMPLES_PATH ${PROJECT_SOURCE_DIR})

# Initialize the SDK
pico_sdk_init()

# Add blink example
add_subdirectory(cmake)
add_subdirectory(blink)
add_subdirectory(serial)
add_subdirectory(clock)
add_subdirectory(i2cscanner)
ターミナルで、pico/works/buildにおりて、
cmake ..
pico/works/build/i2cscannerにおりて、
make -j4
/home/pi/pico/works/build/i2cscannerフォルダに、i2cscanner.uf2ができています。
term.shをダブルクリックして標準入出力を起動します。
I2Cデバイスを二つ、GP9(SCL)/GP8(SDA)、GND、3.3Vに接続します。
ここで、PicoのResetボタンを押したまま、BOOTSELボタンを押し、Resetボタンを離してから、BOOTSELボタンを離します。これでRPI-RP2ディスクがマウントができます。
i2cscanner.uf2ファイルをRPI-RP2ディスクへドラッグします。これでマイコン(Pico)に書き込みが行われ、完了するとリセットがかかり、プログラムが動きます。
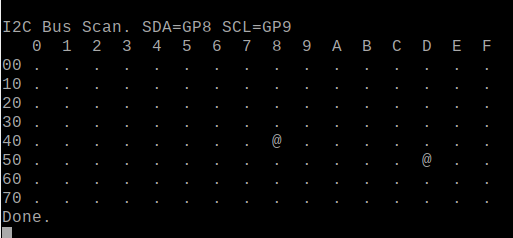
0x48と0x5dに見つけてきました。